

Many individuals and organizations use Google Drive as a place for backing up their data, but the truth is, synced or mirrored cloud storage like Google Drive isn’t actually as good as a backup as you might think.
For example, if you have a hard drive synced with Google Drive, and someone deletes everything on the hard drive, what happens? Typically, due to the sync, the files will be deleted from Google Drive as well. It’s a two-for-one in data loss, and the only prevention is generally having the computer be logged out or offline from Google Drive at the time. Similarly, if you’re struck by ransomware encrypting files and Google Drive syncs the encrypted files, you’re just as out of luck.
It’s generally good practice to back up your Google Drive, whether you use it as stand-alone storage or a local mirror. The only question is, how can you do it? Here’s my step-by-step guide you can follow to do it yourself.
Step 1: Clean Your Drive
Unless time is of the essence, one of the first things you should do before embarking on a comprehensive backup is clean up your Google Drive.
Why? Well, you may be using up a lot of space with files you don’t otherwise need. Older versions of files you don’t use, files and photos you have saved elsewhere, duplicate copies of files that were sequestered in folders away from each other, and even hidden data or data that should be deleted but hasn’t yet been purged can all add to your used storage in Google Drive.
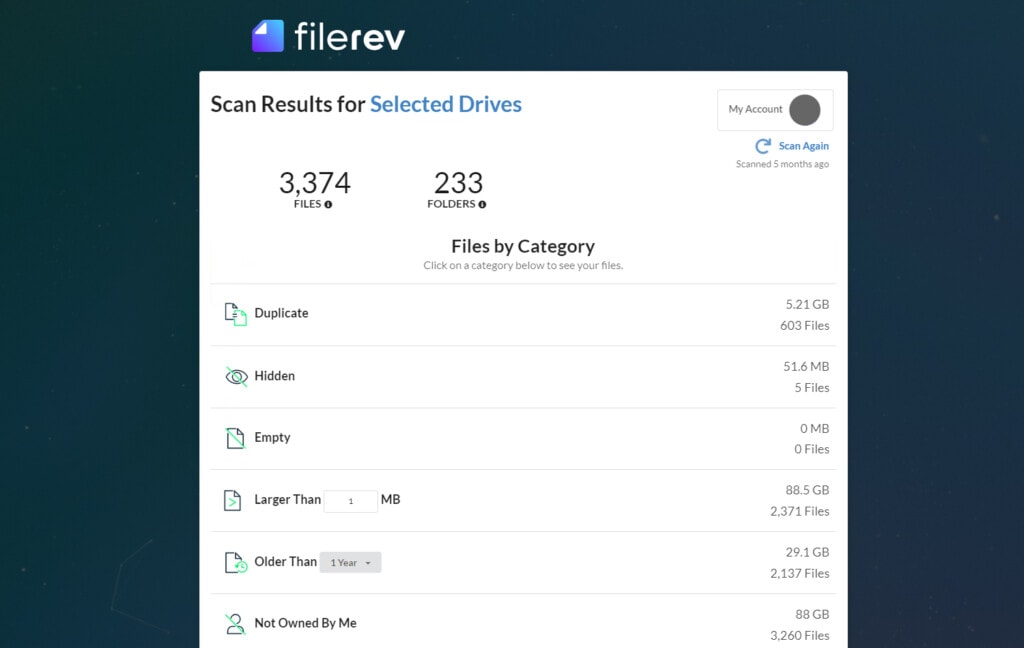
When you use an app like Filerev, you can see a full report of your Google Drive storage usage.
You can sort files to see which are the largest, which are the oldest, which are hidden, which are duplicates, and more. All of this allows you to purge anything you don’t need to save.
The biggest benefit to doing this is that it will make the rest of your backup process easier. You can look for smaller data backup solutions (possibly reducing the price you pay), you can spend less time downloading, uploading, and transferring data, and you know you have the most relevant data backed up with less concern about locating the most updated files down the line.
Step 2: Decide on a Type of Backup
Next, you have to decide on your ideal kind of backup. Generally, you have a few specific choices to make.
The first is onsite versus offsite.
- Onsite data backups are located in the same place as you – the same house, the same business building, the same network cluster – and serve more for file redundancy than for disaster recovery. That’s because if there’s a significant problem, like a building fire/flood or a significant weather event, having your originals and your backups in the same place isn’t going to help you all that much. Anything that destroys one will likely destroy the other as well.
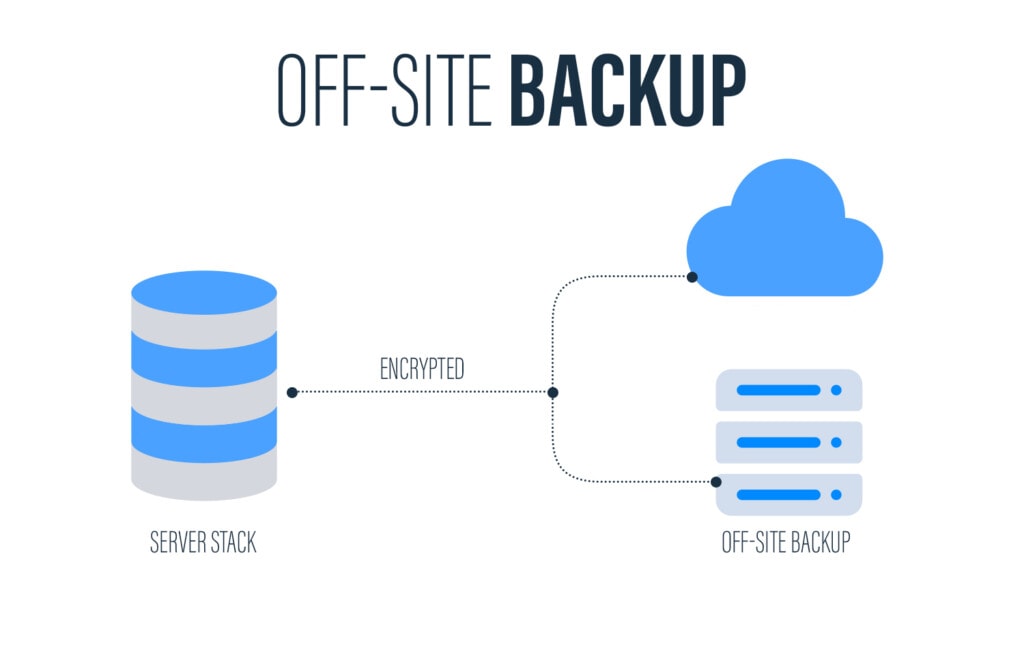
- Conversely, offsite backups require hardware, software, infrastructure, or just storage space (digital or physical) in another location. If your home or business catches fire or floods and your computer system is destroyed, you can still recover using the data archived on a hard drive in a safety deposit box or in a distributed data center.
Offsite backups are more secure but require more work to keep synced and updated and are often more expensive.
The second decision you’ll need to make is between manual backups and automatic, scheduled backups.
Google Drive doesn’t provide much in the way of easy automated backups, unlike, say, enterprise data management suites meant for large businesses. However, they are quite accessible, so third-party apps can do scheduled downloads and transfers to keep your data synced up.
Manual backups allow you to be more customized with what you back up, what you save, and how you name and structure your data. It’s ideal for a more rapidly-changing system or architecture or when you need a varied or custom backup each time. Conversely, automatic backups are more reliable once they’re pinned down. You never get sick of doing it and stop, leading to data loss.
Of course, manual backups are often “free” outside of your time and the money you spend on your infrastructure, while automatic backups usually cost a monthly or annual fee.
You do also need to monitor and test automatic backups. Many companies have been hit by disasters and go to restore from backup, only to find that their backups silently failed months or years ago.
Once you’ve decided on the kinds of backups you want, it comes down to implementation.
Step 3: Consider Google Takeout
Google Takeout is a service Google provides that is complementary to Google Drive. It’s not part of Google Drive, though, and can include more data than you might otherwise intend. So, what is it, and should you use it as part of your backup process?
Google Takeout is a service Google provides to download your “Entire Google Account.” It includes a ton of data, including:
- Your Google activity logs
- Any Android device configuration information
- Galleries you’ve saved through Google Arts and Culture
- Any Blogger data you have, including posts, pages, and comments
- Your Google Calendar data
- Your Chrome history, settings, and bookmarks
- Your Google and Gmail contacts information
- Any files stored in Google Drive
- Google Fit data and history
- Google Business Profile information for businesses you manage
- Google Pay saved information, passes, and other data
- Google Photos albums and files
- Google Play licenses, apps, and data
- Gmail messages and attachments
- Google Maps preferences and saved locations
- A heck of a lot more
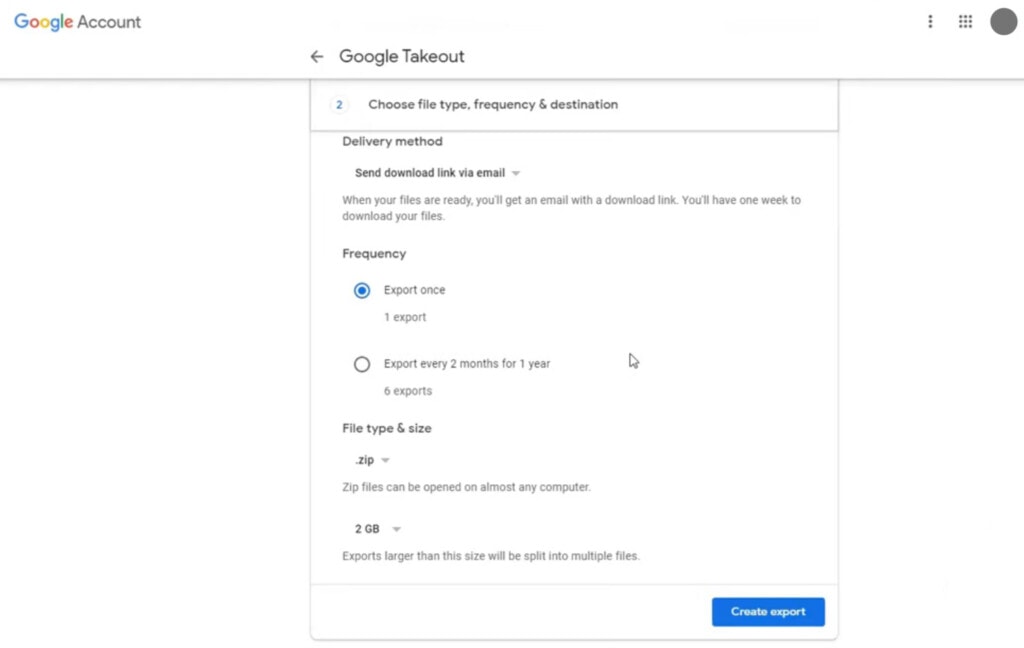
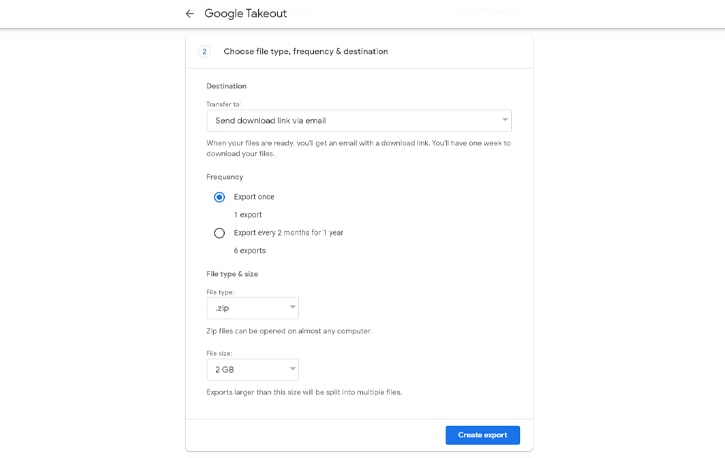
The saving grace here is that you can uncheck everything you don’t want to download. So, if you uncheck everything except Google Drive, you can download all of your Google Drive data in one clean package, which you can then upload somewhere else as part of your backup process.
Google Takeout is fine as an occasional archival tool, but it only works for manual backup options.
Downloading data to upload it again is always inconvenient and slow and best avoided if you can, though you won’t always be able to, depending on the backup solution you choose.
Incidentally, if you want to download your Google Drive information but you don’t want to use Takeout, I wrote a guide on how to do so here, which includes several other options you can use.
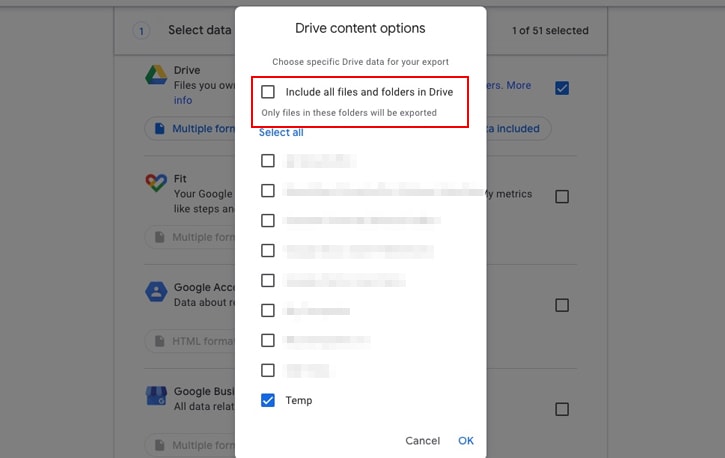
Step 4: Consider The Data Export Tool
The Google Data Export Tool is an effective solution for Google Workspace users to back up their organizational data. It’s sort of like the Takeout Tool but for larger organizations using Google Workspace. The tool can be used to export data from a wide range of Google services, creating a comprehensive backup that spans Google Drive, Calendar, Gmail, Chat, and more.
Super administrators with appropriate permissions and security settings, such as having a 2-Step Verification turned on for their accounts, can initiate the export process.
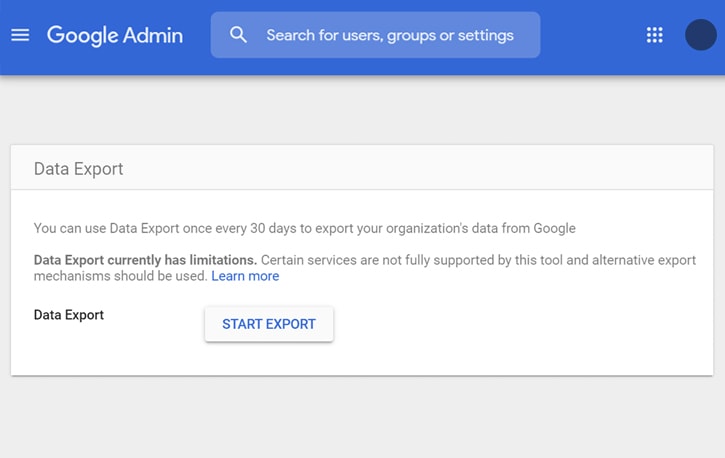
Once initiated, all super admins receive an email notifying them of the pending export, which typically becomes available 48 to 72 hours after the process begins.
A significant advantage of the Google Data Export Tool is its scope. It can export data that’s retained by Google Vault and customer-owned data, which refers to data owned by the organization rather than individual users. For example, for Gmail and Google Hangouts, the tool includes messages in admin quarantine and messages in Gmail confidential mode, where both the sender and recipient are in the same domain.
However, the tool does have some limitations. It does not support the export of certain data types, data for user accounts created within 24 hours before the export starts, or deleted data that was not retained or held by Google Vault policies.
![]()
![]() Note: The Data Export process can be time-consuming, taking up to 14 days, depending on the size of the data export. If you have more than 1,000 users, Google requires that you contact Workspace support before attempting the export.
Note: The Data Export process can be time-consuming, taking up to 14 days, depending on the size of the data export. If you have more than 1,000 users, Google requires that you contact Workspace support before attempting the export.
Step 5: Consider Google Vault
Google Vault is a name you may have heard of, and you might think it’s a Google-provided backup system. The name vault is commonly associated with secure file storage and backup.
Is that true, though?
Unfortunately, no. Google Vault is a system that Google offers as a sort of hybrid between a backup system and an archive. It’s only available to paid Workspace customers, and you have to have set rules in place for data retention, expiration, and more.
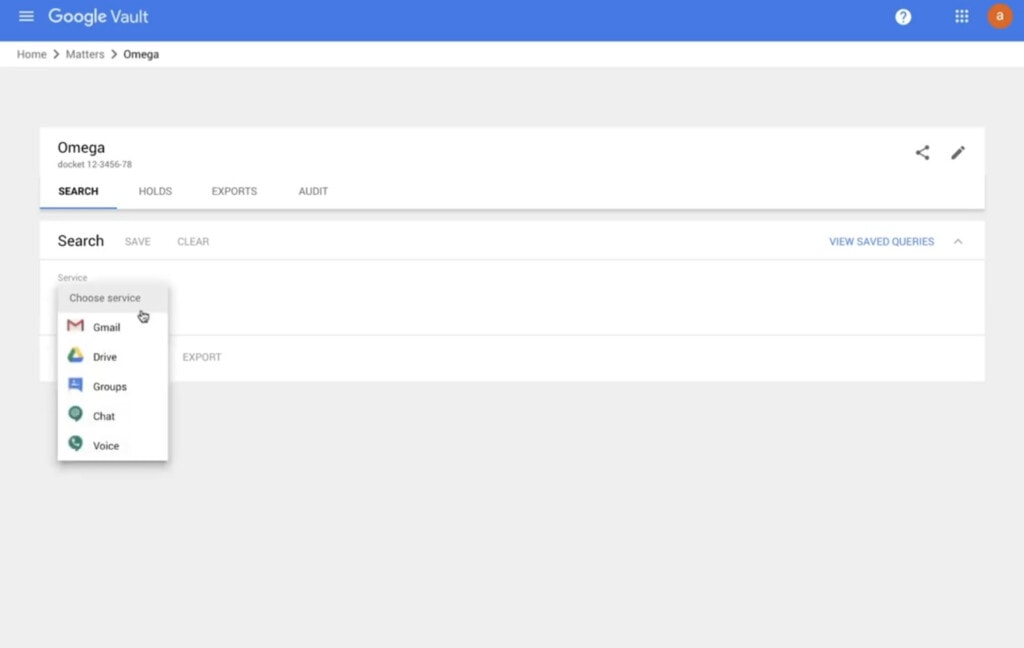
The biggest drawback with Google Vault is that it’s not designed as a typical backup solution, so the recovery part of the backup is left behind. You can search your data and restore anything you like, but it can take some time to bring data out of the Vault and restore it, and there’s no “restore all” functionality. It’s meant more for legal compliance and archival than it is for disaster recovery.
Now, if that’s the reason you need data storage in the first place, Vault can be a great option. If restoration is an unlikely event and will be limited in scope, Vault is nearly ideal. And, since it comes with most paid Google Workspace plans, you might already have access to it and need to configure it. It’s also automatic once you set retention rules, so it has that going for it, which is nice.
Step 6: Try Third-Party Automated Backup Systems
There are, of course, a ton of different options out there for backing up data. You have to pick a company with the right array of features at a price level you’re willing to accept. I’m not judging or recommending specific platforms but rather providing a selection you can use to investigate.
Consider checking out:
- Spin Backup, a data loss prevention and disaster recovery app that works with Google Workspace, Microsoft 365, and Salesforce.
- Cloud HQ, a backup and sync platform that can download and backup Google Drive into other formats, automatically sync between Drive and Dropbox, or even back up data to Amazon S3.
- Acronis, an enterprise-grade backup platform with a wide range of options available.
There are many more as well.
You can find command-line utilities with complete customization, simple out-of-the-box solutions that back up a Google Drive and nothing else, and everything in between. Whatever your needs, there’s guaranteed to be some platform out there that will suit them perfectly – if you can find it. Incidentally, if you have any particular app you’d like to recommend, please let me know in the comments section below.
Step 7: Try a Manual Backup
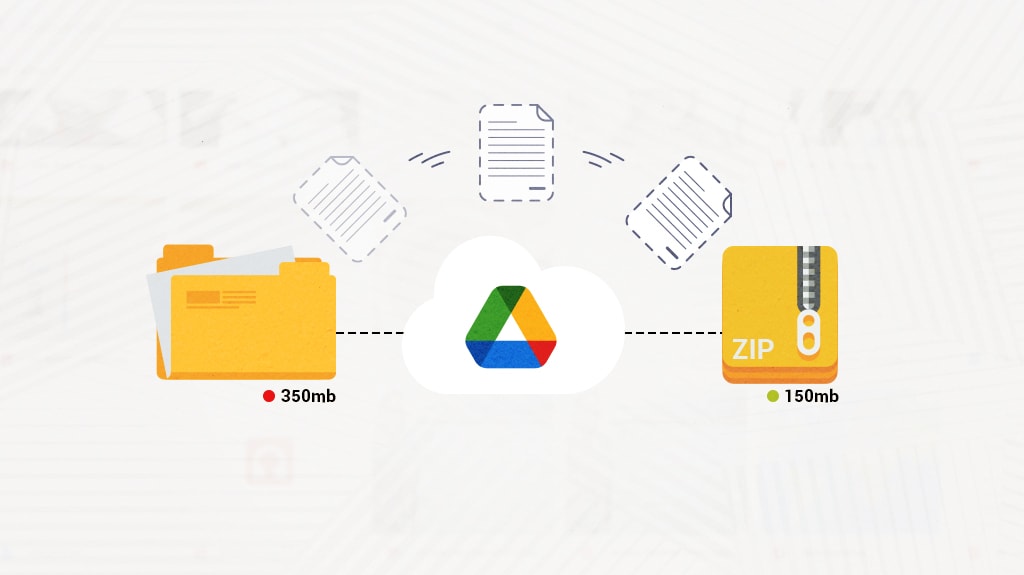
A manual backup is the easiest, if most time-consuming and tedious, of the available options. You can follow the instructions above to download your Google Drive data, whether you do it file-by-file, through Takeout, or as a Zip.
Then, you can upload it somewhere else. That somewhere else could be another computer, another cloud platform like OneDrive or Dropbox, or a custom storage solution using Azure, Amazon S3, or another option.
![]()
![]() Note: The benefit of a manual backup is the customization. You can do anything and everything you want to do with the right resources. The downside, of course, is that you have to do it all yourself and either code up a timed job to repeat it or replicate it each time you want to take a new backup.
Note: The benefit of a manual backup is the customization. You can do anything and everything you want to do with the right resources. The downside, of course, is that you have to do it all yourself and either code up a timed job to repeat it or replicate it each time you want to take a new backup.
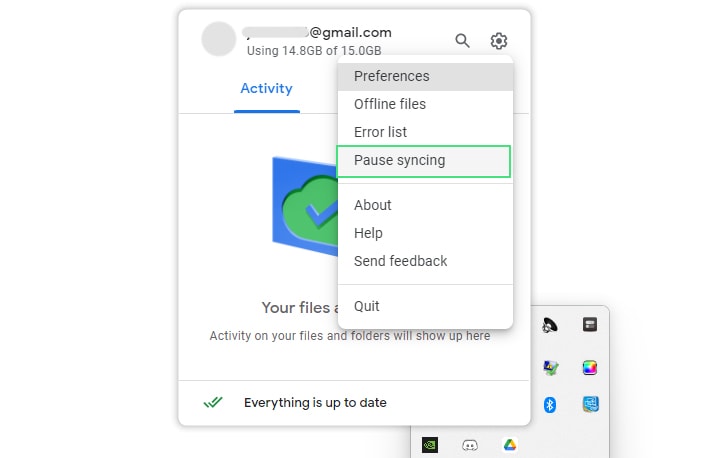
A Note on “Google Backup and Sync”
Google Backup and Sync is Google’s official installable app for Windows and MacOS. After it’s installed, it can download your entire Google account and maintain a backup of your files on the computer that it’s installed on.
The downside to this method is that it’s not perfect as a backup solution. There are two methods that the Backup and Sync app gives you, and both of them have issues:
- Mirror: Mirroring files will download all of your files from Google Drive and store them on your computer. It’s excellent for having files in two places simultaneously, but if you keep it enabled, it will mirror whatever goes wrong on your Google account onto your computer and vice versa. If your computer is compromised and your files are deleted or files are removed from your Google Drive account, those changes will be synced between those two points. There are also known cases of ransomware, where your backup computer gets infected and syncs infected files to your Google Drive, overwriting your files with encrypted ones.
- Stream: This isn’t really an option since Stream doesn’t back up your files; it just displays shortcuts to files that are stored in the cloud. It’s not a backup solution, so we won’t cover it in detail.
Even though this is Google’s official app, I don’t recommend it as a reliable backup solution for this reason. The only time it might work is if you have a computer that is a dedicated backup system and you periodically and manually enable “Mirror” to download the latest versions of your files and then turn “Mirror” back off.
But why go through all of that effort when there are much better solutions?
Remember Backup Best Practices
Data backups are only as good and reliable as you can keep them. Following best practices is essential to ensure that you don’t run into corrupted data, incomplete or old backups, or unusable archives.
Here are some of the most important best practices you should keep in mind.
- Decide on a retention span. It’s one thing to take a snapshot of your system every six months, but it’s quite another to take monthly backups that you keep around forever. Storage costs can very quickly balloon to unsustainable levels.
- Encrypt and protect your data as necessary. Your family photos and memes folder might not need protection, but business-critical data or customer information does, even if it’s in a secure location.
- Don’t forget physical protection. It doesn’t do you any good if you store your backed-up data in your Network Attached Storage that you keep sitting on a shelf with no UPS, no surge protector, and no redundancy. It’s not a problem if you use a data center, but that’s a lot more costly.
- Don’t forget to test both your backup process and your restoration process. If your backups fail, how do you know? You should find out well before you need that data. Similarly, all the backups in the world aren’t worth much if you can’t actually restore that data. Test it all and monitor it regularly.
- Don’t rely on “spinning rust” hard drives; use solid state, physical media, or distributed data centers to ensure your data has the least chance of corrupting or degrading over time. At the same time, don’t go overboard; your family photos probably don’t need to be kept on tapes in a museum-grade archive.
Once again, I also recommend using Filerev to assist with your data management.
Filerev isn’t a backup utility, but it’s a powerful tool to help you sort through your data and helping you prune down unnecessary files so your actual backups are faster, more efficient, and limited to what you actually need to save.
Related Posts
 The Ultimate Guide to Google Drive Data Retention Policies
 Powerful Tool to See Your Google Drive Folder Size
 Step by Step: How to Download an Entire Google Drive Account
 5 Ways to Back Up Google Drive to an External Hard Drive
 FAQ: What Happens When Your Google Drive Storage is Full?
 File Size Limits: What is The Max Upload Size on Google Drive?

