
If you’re using an iOS device, you have a lot of convenient apps and programs available to help you manage your data. One of those, taking the form of cloud storage, is Apple’s iCloud. Sometimes, though, you might not want to use iCloud. Maybe you’re wary of a hack. Maybe you have other devices on other ecosystems and want something that’s more accessible outside of the Apple infrastructure. Or maybe you just want a secondary backup.
The first roadblock here is that if you’re managing photos, you have at least three different ways they may be handled on your device. Apple’s original photo management app, iPhoto, was discontinued in 2015 but still lingers on some old devices, and some people like to keep it rolling with third-party patches. Their replacement app, Photos, works in a very different way and is a lot more like other modern photo management apps. And, of course, you can manage photos just as files using the Apple file browser.
Today, I’m focusing on just one of those, the old iPhotos option. Anyone with an old iOS account who used iPhotos back in the day probably has a lot of old photos they want to transfer to a more modern platform. Many people dislike the direction Apple Photos was taken and prefer to have those photos stored safely elsewhere, and Google Drive is frequently the best choice. So, how do you migrate from iPhotos to Google Drive? Let’s dig in.
Step 1: Understand Libraries
The first thing you need to do is know what you’re working with. The old iPhotos app wasn’t like our modern photo storage apps. It doesn’t just store all of your photos in folders; instead, it organizes them into what it calls Libraries.
An iPhoto Library is sort of like a combination of a zip file and a folder. It’s one master library that contains many files and folders, which range from folder structure information to photo creation timestamps to thumbnails generated for the photos, album data, and more. And, of course, buried deep in that library file is a folder with all of your actual photos in it.
Now, most people don’t actually need or want most of this data. Modern computers generate thumbnails automatically and don’t need to store them separately. You don’t need a separate file with information about the photo creation and other metadata because it’s all part of the photo itself.
There are two important parts of the photo library that you need to know about before migrating your photos to Google Drive.
The first is the Masters folder. “Masters” is a term used in various industries to mean the canonical version of a file. In the case of music, it’s the highest possible quality version with no cuts and no edits done to it. In the case of movies, it’s the full, uncut version before edits. In photography, it’s the original photos, exactly as they were captured before any editing is done to them.
In your iPhotos photo library, there will be a folder named Masters, and that folder contains all of these unedited, full-size, original-quality images as captured by whatever device took the photos and uploaded them to iPhotos.
The second part of the library you need to know about is the photos after any changes you’ve made to them. These are located where they should be in the albums folders.
You can read more about all the other assorted stuff in the iPhoto library here. Most of it isn’t terribly important unless you plan to keep using iPhoto.
Step 2: Reduce File Size
One of the biggest challenges you’re going to face in moving an iPhoto library to Google Drive is that a single iPhoto library is treated as a single large file. That file, which might contain hundreds of gigabytes of photos, can be extremely difficult to upload all at once without a fast, stable internet connection.
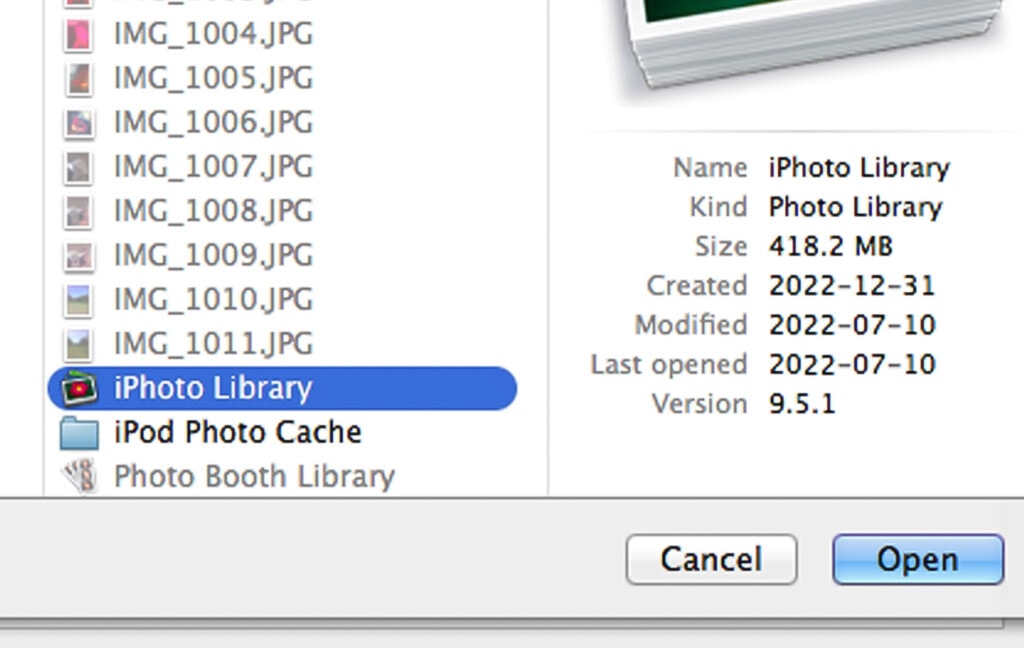
Thus, your first step – and what I consider to be the first step before any serious data migration – is to go through and clean up what you can. To do this, you’ll need to open up iPhotos and use the tools built into it to manage those old photos; if you simply remove, rename, or delete files from within the library using Finder, you might screw up the library as a whole, and it won’t function anymore.
I recommend deleting photos you don’t need. Anything more than that is up to you, but most other forms of photo editing can be done later. It just saves you time and space by getting rid of photos you don’t actually want to keep. Why bother transferring them only to delete them, right?

Note: if you don’t actually want to keep using iPhotos, you don’t need to. You can simply find all of your masters in the Masters folder (and any edited versions in the albums if you need them) and move them to folders elsewhere on your computer. This is fairly common if you’re trying to recover photos from an old, archived iPhotos library, but you don’t currently have a device that can run iPhotos.
You can, if you want, import the library from iPhotos into Photos and manage all your images with more modern tools. Really, you have a lot of options, so it comes down to how you want to sort and manage your images.
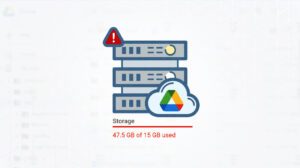
Step 3: Check Google Drive Capacity
Google Drive, by default, gives a free user up to 15 GB of storage space to use across their Google account. This includes anything stored in Drive, anything created with Google Docs, Sheets, Slides, or other productivity apps, anything made or managed in Google Photos, and even emails and their attachments.
Apple’s iPhotos had no such capacity limitations. The only limit to the number of photos you could store in a single iPhoto library is the size of the hard drive inside the device that contains it. For an old iPhone, that might be pretty small, but for an iMac or other full computer, you could have hundreds of gigabytes or even terabytes of data in that library.
Needless to say, you can’t cram 300 GB of data into 15 GB storage space. Even the most aggressive file-crunching compression algorithms can’t pull that off.
You have two options here. The first is to be even more aggressive with step two and get rid of any photos you think you don’t need. While 15 GB is plenty of space to store a lot of data, it’s still limited, and you might not have space for more than 5-10 thousand photos. Of course, combing through all of these photos, especially on an old device, isn’t exactly the easiest option.
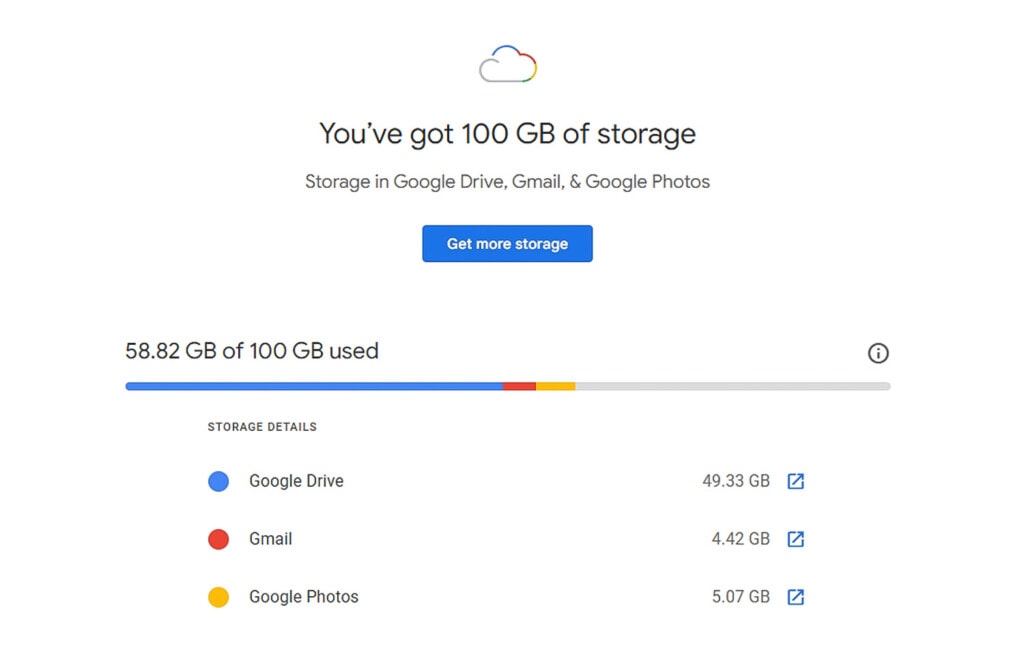
The second option is to increase your storage. You can purchase a ton of additional storage space from Google for a very small fee using Google One or even Google Workspace. While the true “unlimited storage” options no longer exist, you can still get an immense amount of storage space in a variety of ways.
Step 4: Export Photos and Move Them to Google Drive
Once again, you have two options here. Well, technically, three: you could just drag-and-drop the entire iPhoto library to Google Drive if you wanted. Unfortunately, that will upload all of the useless data files and other stuff you don’t actually want or need on Google Drive, so I don’t recommend it. So for the real two options:
The first is to use the built-in iPhotos export function to move your remaining photos from the iPhotos library to Google Drive.
To do this, you will need to follow this procedure:
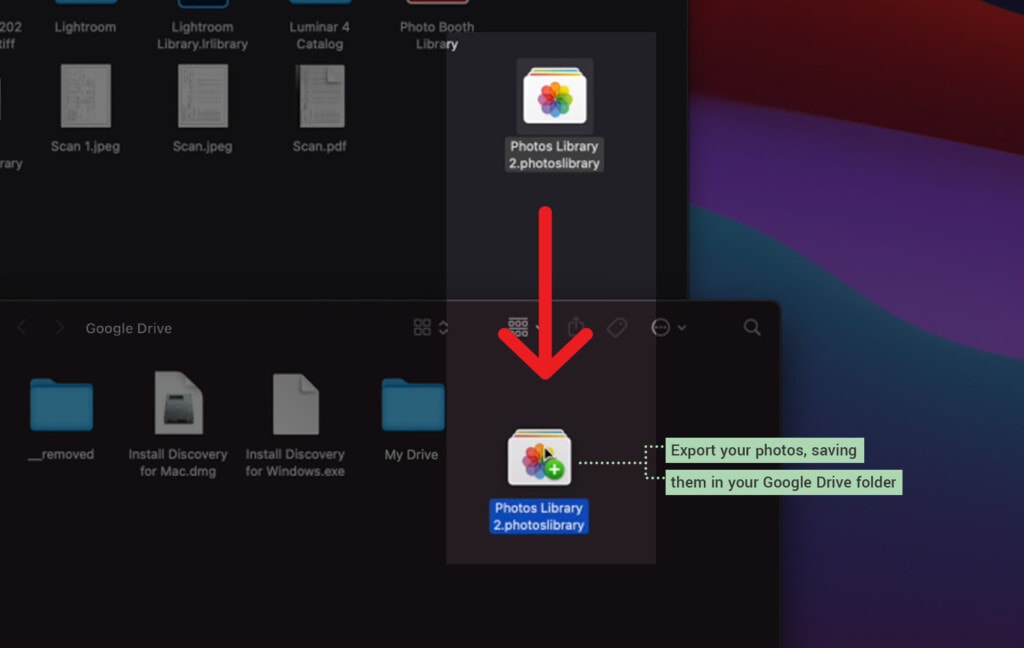
- Install Google Drive for Desktop on the same device that has the iPhoto library on it.
- Choose either Mirroring or Streaming for your files; either way, they are uploaded to Google.
- In iPhotos, export your photos, saving them in your Google Drive folder created by Google Drive for Desktop.
- Wait for this operation to complete.
- Wait some more for Google to process the upload/sync and put the photos on their servers.
- Verify that the files are uploaded properly.
- Dispose of the original however you see fit.
This method does, again, have the downside of having to use iPhotos to export the files. Speaking of, here’s how to do it.
- For original/master files, click on File and then Export to save them to a location of your choice.
- For edited/resized/altered files, click on File and then configure resizing options before clicking Export.
You can also export the files to any folder on your device and upload them later. That’s method two.
You can either export the files to a folder on your device for transfer, or you can simply dig into the iPhotos library with Finder. It is, after all, just another sort of folder. You’ll ruin the iPhotos library if you remove the files from it, but copying them out – while doubling the space used by the photos – allows you to access them elsewhere.
Once you have the files you want to upload, you have, you guessed it, two options.
The first is basically the same as what was mentioned above: install Google Drive for Desktop. This creates a whole drive on your device that acts as if it’s just another folder or drive in your device, but it is actually Google Drive. Drag and drop or copy and paste all of the files you want uploaded into that folder, and wait for Google to upload them.
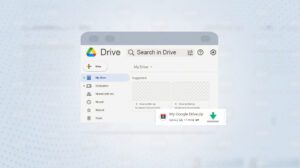
Alternatively, you can use the web interface to do it. Logging into drive.google.com allows you to navigate to the folder where you want your images and then just drag and drop them in.
The downside to this method is that you’re uploading them in real-time, sequentially, in an operation. If your internet connection is interrupted, the upload can fail partially through. Unlike with Drive for Desktop, it won’t resume automatically, either. You need to notice that it failed, find what photos it failed to upload and start the upload again with those files.
On the plus side, you don’t have to install anything, and if you’re working with an old and fickle device, you might not be able to get Drive for Desktop to work on it anyway. That’s the problem with dealing with outdated software, after all.
There is one important note about this whole process. The first is that unless you take the initiative to do so, Google Drive won’t mirror the folder structure from iPhotos. You’ll need to recreate the folders as you go.
An Alternative Process
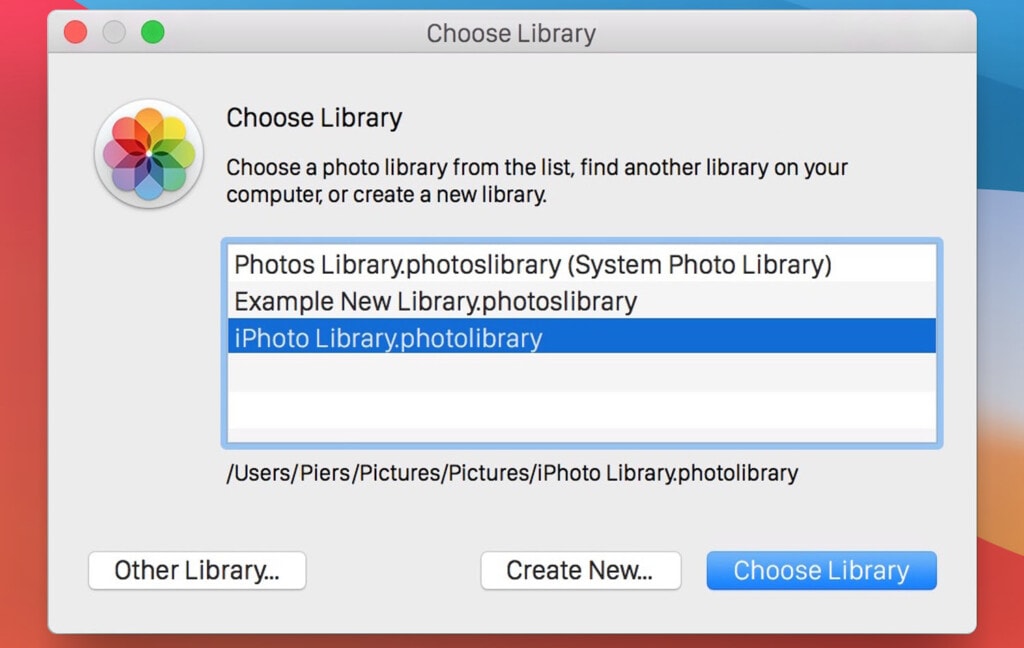
Another option you have is to import the iPhoto library to Apple Photos, converting it to modern storage. This is pretty simple; all you need to do is open the Photos app while holding down the options key. This will prompt you to open a new library, which allows you to choose the old library you’re trying to upload. The conversion process will strip a lot of the unnecessary cruft from the library and convert it into something usable by modern, updated computers.
From there, you can use whichever process you choose to upload or sync your photos to Google Drive, either through Drive for Desktop or simply through the web app, all as mentioned above.
Finally: Clean Your Drives
At this point, you have another opportunity to clean and organize your photos, this time through Google Drive. Since Google Drive stores your backed-up copies of the photos, you can work through them and get rid of the ones you don’t want. You may also have accidentally copied over duplicates of files and images – for example, if you have the full-size masters and the smaller compressed versions – and can get rid of the duplicates you don’t need.
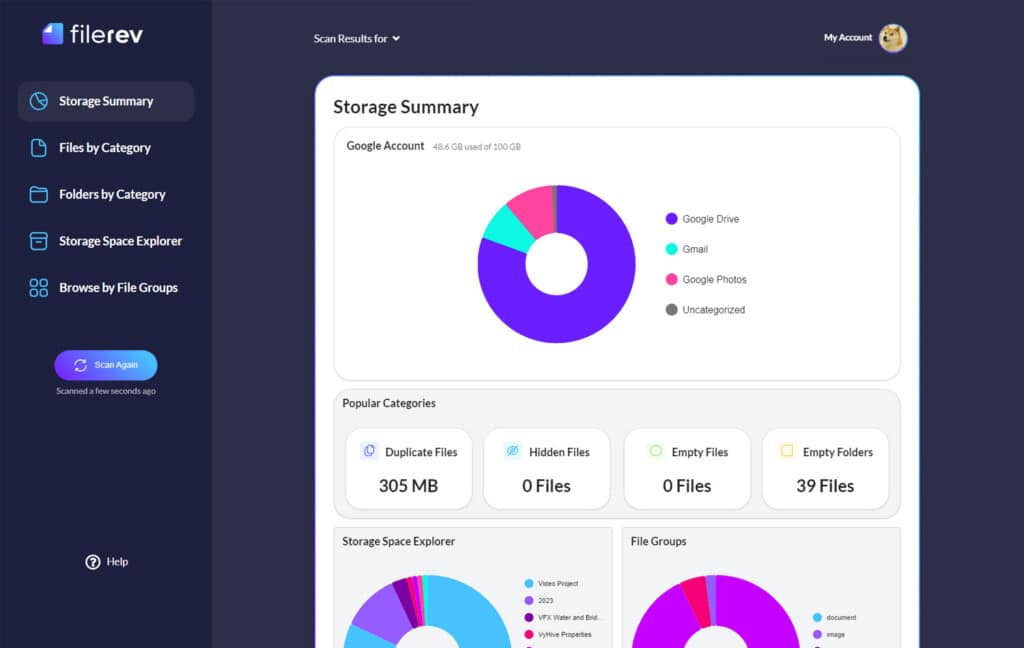
Filerev is one option here. I built Filerev to allow you to review and audit a Google Drive, and that includes anything you put in it, new or old. You won’t get much use out of certain filters, like identifying the oldest images – after all, they’ll all have the same creation date or upload date – but you can still find the biggest images to remove if you don’t need them, or target them for later compression.
It’s quick and easy to get started; all you need to do is click here.
Related Posts
 Powerful Tool to See Your Google Drive Folder Size
 How to Reduce Google Drive Storage and Organize Your Files
 File Size Limits: What is The Max Upload Size on Google Drive?
 How to Copy ‘Shared With Me’ Files Between Google Drives
 FAQ: What Happens When Your Google Drive Storage is Full?
 Step by Step: How to Download an Entire Google Drive Account

