
Sometimes, it’s difficult to manage files and folders on Google Drive, with security being a particular hurdle. Here’s a useful guide on five solid strategies to lock down the security of your Google Drive files and folders.
Sadly, Google Drive skips out on a built-in password-protection feature for folders. But wait, hold that panic! I have some techniques right here. These tips include restricting file access to certain people, putting a safeguard on your files or folders before their Google Drive process (encryption is the important word here), or maybe picking a useful third-party security app.
So, shall we talk about each tactic, shall we?
Narrow Down the File Access to Specific Users
Want to give selective access to files and folders on your Google Drive? Here’s what you need to do.
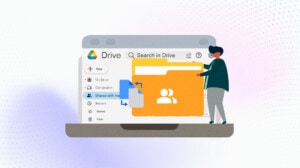
First, open up the specific file on your Google Drive you’re keen on sharing. See that “Share” button in the top right corner? Click it. It’ll lead you to the sharing settings, where you can change permits for other users to view, comment, or modify the document. Scroll down to “Get Link” and pick the right access level: Viewer, Commenter, or Editor. What if, for some reason, you needed to restrict this file access? Then, all you have to do is add the user’s specific email address.
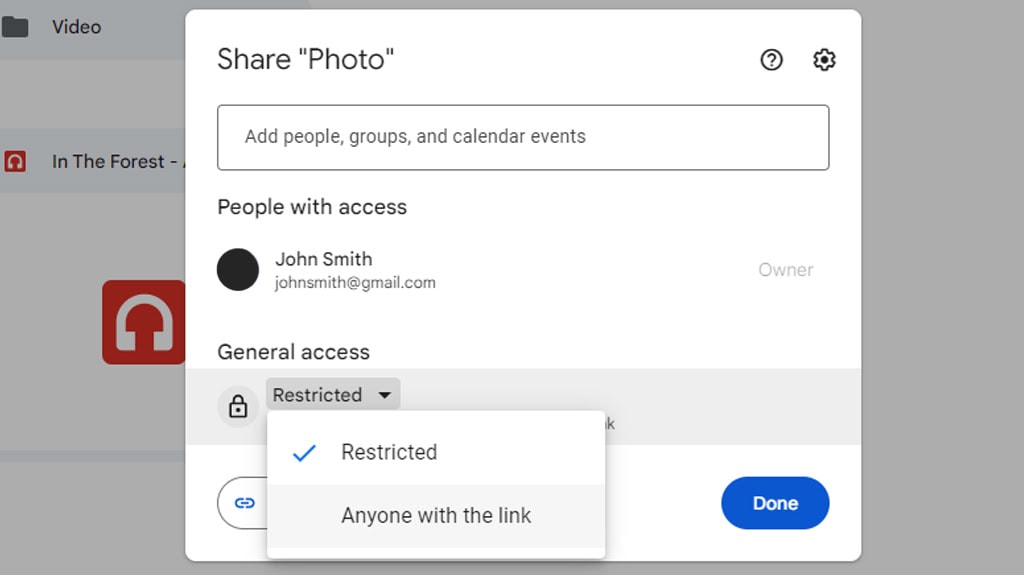
Sharing folders is a cinch too, almost a carbon-copy of the steps for single files. Hunt down that folder and tap on the “Share” button. under “General access,” you choose who gets in; could be anybody who snags the link or a few handpicked users. And then, go ahead and assign roles; Viewer, Commenter, or Editor depending on what level of access they need.
One of the cool things I find with Google Drive is the option to reshuffle sharing permissions on shared folders at any given moment. Also, it lets multiple users edit a document simultaneously in real-time. For example, I could share a file with my team, and they’d have the power to check it out, add comments, or make changes. But remember, as easy-breezy as the whole sharing thing is, you’ve got to be real careful, especially if your shareable content is packed with sensitive info.
How to Encrypt Files or Folders Before Uploading
Go ahead and use your operating system’s own encryption functions to protect your Google Drive files and folders. BitLocker is your friend if you’re using Windows Pro; it’s great for both full drive and individual file encryption. Device encryption might be an option if you’re a Windows Home user, but that all depends on what your hardware can handle.
If you’re a MacOS user, though, you’ll have a different encryption option. All you have to do when managing an external drive is enable encryption by right-clicking on it from Finder.
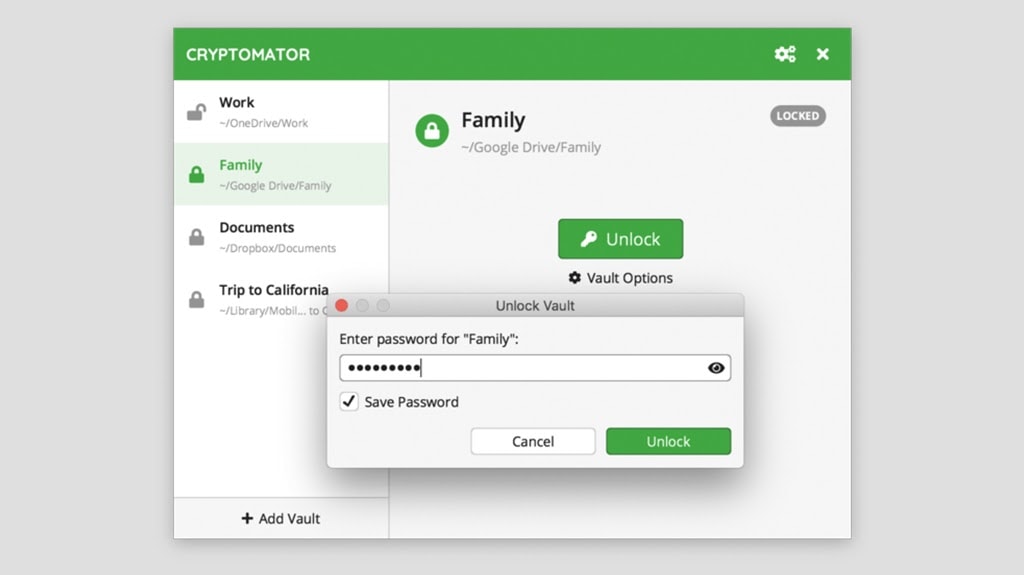
As for keeping things safe in the space of cloud storage, yes, there are tools for that, too! Cryptomator is one of these open-source tools that could be of help. What does it do, you wonder? Well, it creates a virtual drive on your computer. So, when you plop files in this drive, they get encrypted, and boom! Ready for Google Drive. You might come across another tool named Boxcryptor that works in somewhat the same way; it gets the encryption done before your files touch cloud services like Google Drive. But a heads up: its free version comes with a few limitations.
So, where do you start? Easy! Choose the encryption tool that’s best for you and get it installed. Start encrypting these files or folders you want in Google Drive. Once encrypted, you can upload them as you normally would. Remember, though, you can’t edit encrypted files online in Google Drive. If you want to do anything with these files, you’ll need the original encryption tool.
I must stress this: keep your encryption passwords safe. Lose that, and you might never see your encrypted files again. Yes, encryption can protect your files, But remember, it also requires you to handle your passwords astutely. In a nutshell – choose to use encryption with Google Drive, but be sure you get what that responsibility means.
Implement Protection with Third-party Software
Let’s chat about VeraCrypt; it’s pretty neat and free for all main operating systems. After you have it installed, here’s what you do. First, build an encoded file container in the Google Drive folder on your local computer. Then, pretend this container is a virtual drive and load it up. Do you have some confidential files? Pop them in this drive. Done? Unplug the drive, and boom! An encrypted container – all safe and sound in your Google Drive.
And you know what? Don’t count out Microsoft Office for encryption. It works like this: open a document you want to protect. Go to file, then info, and click on Protect Document. Choose Encrypt with Password. Set a strong password – strength is important here. Once that’s done, and only then, move the document to Google Drive. Make sure you’ve saved it first!
There’s also this software called EaseUS LockMyFile. It’s pretty cool; it lets you encrypt entire folders. Choose a folder you’d like to protect, start the encryption process and set a password. Follow their instructions; you’ll be all set. Then you can upload this secured, encrypted folder to Google Drive.

Did you know you can limit access to Google Drive? It’s not quite password protection, but it’s a bit of control. All you need to do is hit “Share,” then click on “Advanced,” after right-clicking on the folder in Google Drive. Turn off link sharing, and you can specify access rights. Is it perfect? No, but it’s something.
Could we discuss Google account security for a second? It affects your Google Drive and your account as a whole. So, what’s the secret? A solid password and two-factor authentication. Give that a shot, trust me.
I can’t stress this enough: when it comes to choosing third-party software, reliability, and security features are important. There’s a load of software out there promising extended security for Google Drive; choose one with a high level of encryption and password protection. In my opinion, this is important when it comes to securing your things. It sure is worth it to keep your documents safe.
Encrypt Documents via Microsoft Word
To level up your security, let’s encrypt all your files using Microsoft Word before you move them to Google Drive. First up, open the specific document you want to encrypt. Here’s the step-by-step: click the file, head to info, go for Protect Document, and wrap things up by choosing Encrypt with Password.
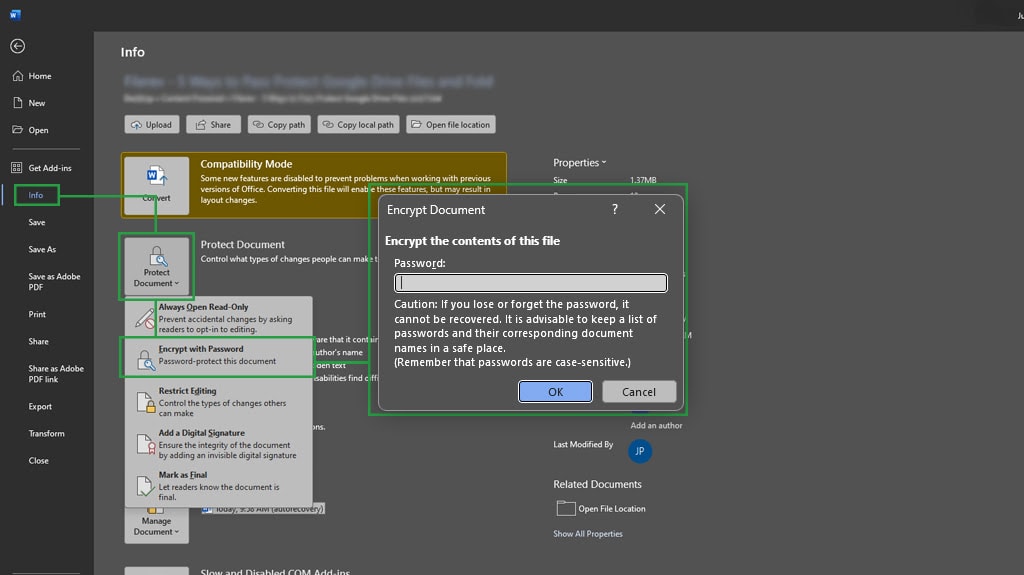
You’re going to need a new password – an important step if you want solid encryption security. So, make a strong password, keep it under 15 characters and always introduce case sensitivity. When you have it figured out, you’ll need to type it in again, just to double check it. With that done, save your document. Quick heads up, Word doesn’t let you recover passwords, so guarding it safely is important.
Once the document is neatly encrypted, let’s turn our attention to Google Drive. Grab your favorite browser, go to the Google Drive website (drive.google.com), and hit the “New” button on the top left of your screen – time for a File Upload. Find and upload your encrypted file. And hey! While you’re moving the file to Google Drive, remember this: Google Drive’s own AES256-bit encryption gives your Word encryption an extra layer of protection.
Ready to open the encrypted file? Just pull it from Google Drive and punch in the password when asked. Forget your password? That’s where the problems start because Word doesn’t have a password recovery tool. So remember to think ahead about how you’re going to store the password and share it (if needed).
Need to edit your secure file? Easy – open it in Word. After you type in your password, make the changes you need, save it, and – if needed – move the document back to Google Drive one more time. It may seem a bit of a hassle, but trust me – these efforts pale in comparison to the protection you’re affording with your document.
Modifying Sharing Settings on Android Devices
You can handle the changes to file and folder-sharing settings in Google Drive on your Android device; let’s start by opening the Google Drive app. What is your next step? Figure out the file or folder for which you want to change the sharing settings. Just look for that three-dot symbol next to your chosen file or folder and give it a tap; that’s how it’s done.
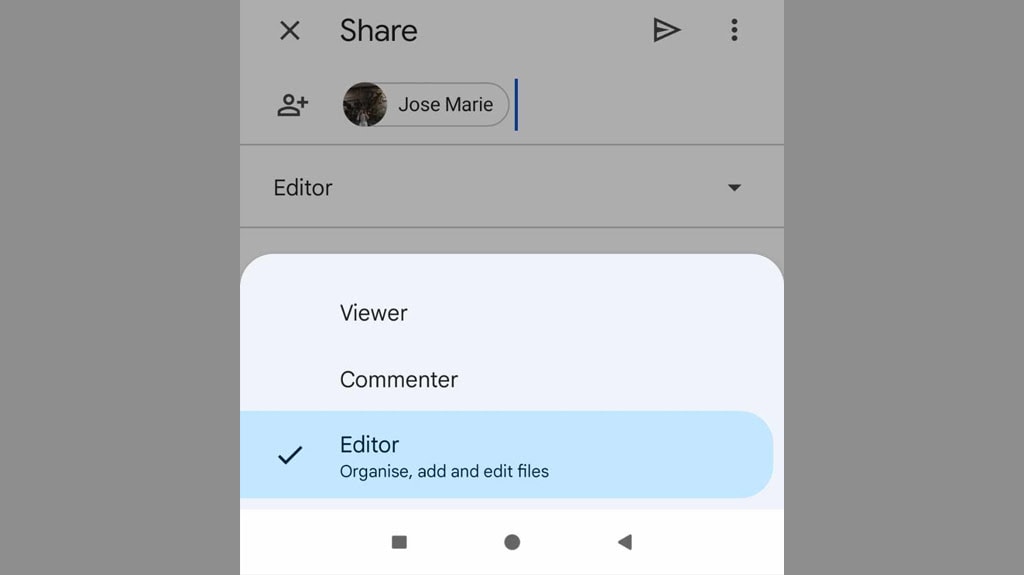
You’ll add people or groups using the input space provided by choosing Share from the Options menu. Wondering about the types of access they can have? Here’s a tip: you can pick “viewer,” “commenter,” or “editor” from a dropdown menu next to each entered email. If you want to control the file’s accessibility, basically tap on the settings gear symbol. This is where I’d disable the “Editors can change permissions or share” feature.
Should you wish to cut off access, track down the person in the sharing settings, hit the down arrow next to their name, and then pick “Remove access”. What about stopping viewers or commenters from downloading, printing, or copying your files? Just take yourself over to Settings in the Share dialog and disable the “Viewers and commenters can download, print, and copy” feature.
Here’s an option to amplify your sharing reach: generate a link by picking “Copy link”. Then, change the link sharing settings to “Anyone with the link” and assign the permissions needed.
I hate to be the bearer of bad news, but the rule of not downloading, printing, or copying is only for files, not folders. But, you can change the settings for individual files within a folder. Also, here’s a cool feature: Google Drive lets you set an expiration date for a person’s file access.
Surrounded by complex sharing situations, like sharing with people who don’t have Google accounts or needing to set expiration dates? You might find third-party Google Drive apps pretty useful. And remember, it’s perfectly possible to share files and folders safely and securely by following these steps – it’s easier to pull off than you think!
Security Starts With Organization
You have to keep your Google Drive files safe; that’s really important! What is the best way to do it? Make smart choices and work with the right tools. That could mean limiting who can use certain files, coding files, or folders before you upload them, roping in extra software for a security boost, or choosing Microsoft Word to code your docs and make your data safer. It might seem tough at first glance, but with careful planning and a focus on securing your data, it’s a piece of cake.
What is your first useful step in making your Google Drive safe? Creating a system that’s trustworthy, secure, and super organized. Ignore any one-size-fits-all solutions – you have to tailor your technique to what you need.
To make your online space safer, keeping out anyone not invited in is essential. Equally important, if not more important, is keeping your business private and owning your information. Now you might be asking, what kind of safety measures are right for you?
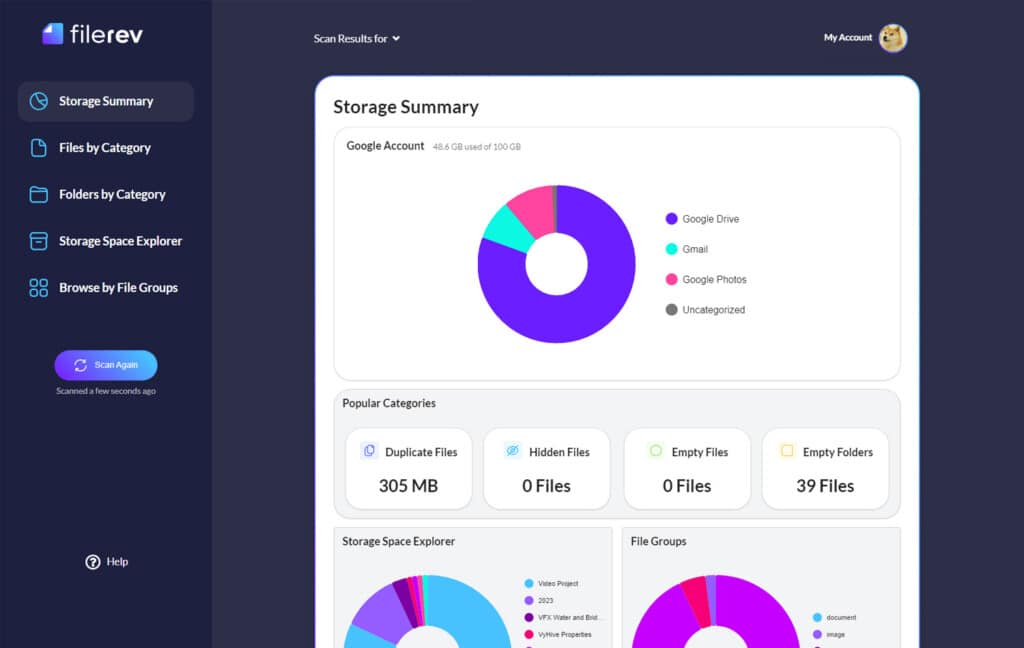
Let’s start by taking a second look at rearranging and organizing your Google Drive. Recognizing the different security approaches is important, but I also suggest picking a tool that helps you make the most out of your Google Drive. Filerev, an app that I specifically created for this job, could be your new favorite.
Take full advantage of our tool to clean, optimize, and review your Google Drive files, and find out how Filerev can slide seamlessly into your organization’s schedule. I want to make your Google Drive safer, more efficient, and easier to use. So, in my opinion, giving Filerev a shot for your data managing needs could be an excellent next move. Also, it’s free to try! And if you have any questions about it, please feel free to let me know!
Related Posts
 How to Encrypt Files and Folders on Your Google Drive Account
 Powerful Tool to See Your Google Drive Folder Size
 How to Delete Empty Folders in Google Drive with Filerev
 FAQ: Which File Types Are Supported on Google Drive?
 How to Copy ‘Shared With Me’ Files Between Google Drives
 Google Drive Trash Tutorial: How to Delete and Recover Files

