
A fact of modern digital life is that, as computing power increases across the board, optimization suffers. After all, when you have a graphics card with multiple gigs of ram attached, you don’t need to compress videos down to the size of postage stamps, and high-speed internet makes it feasible to watch 4K video as a stream.
What many people don’t know, however, is that video files can get extremely large. It’s not just about resolution, though; of course, that plays a part. The encoding and compression of the video itself have a significant impact on the size of the files you use and transfer.
The needs of a home user saving some videos from their phone versus a content creator professionally managing videos on YouTube versus a high-end movie studio handling raw footage from hours of shooting for IMAX formats can be immense and varied.
If you’re using Google Drive to archive, store, transfer, or back up your video files – no matter whether you’re using it personally or professionally – it’s important to know how Google handles those files.
After all, if you need uncompressed, original-quality videos and Google compresses them, that would be a problem, right? Well, let’s talk about how Google handles video files, what restrictions it has, and how you can get the most out of Drive.
Does Google Compress Your Videos?
First off, let’s ask the simple question: does Google compress your videos when you upload them?
The answer here is a little more complex than you might imagine. The answer is both yes and no.

Why? There are two ways to upload videos to your Google account: directly to Google Drive and through Google Photos.
When you upload a video file to Google Drive directly, it’s uploaded as-is. There’s no compression or reduction in video quality on the original file. Note that “original file” verbiage; I’ll get deeper into that in a bit.
When you upload a video file via Google Photos (or the basic Android data backup settings), it’s not technically added to Google Drive; it’s added to Google Photos. Even though it’s all attached to the same Google account, the process and tools used are different. In this case, your video may be compressed.
Google Video Backup Quality Options
When you back up your videos using Google Photos or the built-in media backup options, Google gives you a choice of three different quality levels. These are Original Quality, Storage Saver, and Express.
“Original Quality” is just what it sounds like the video in the resolution and quality level you captured it, uploaded as-is. These are the largest files, and they can get pretty big! One minute of 1080p video can be around 20 MB in size; one minute of 4k video can be 100 MB or more. Compression ratios, encoding formats, and bitrates all play a part.
“Original Quality” is a great option to use if you want to save a video in its original, high-quality format for use in video editing projects or in cases where you need all the detail the video can provide. It takes up a lot of space, though, and the basic Google Account only has 15 GB of storage space, so just a few videos can eat that up very quickly.
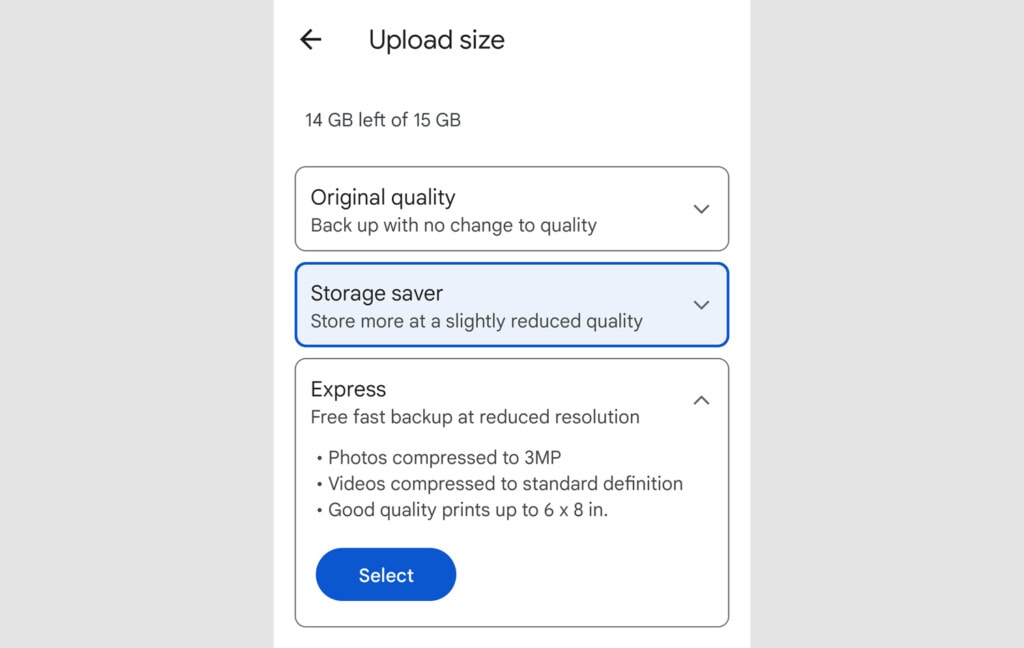
“Storage Saver” is what was formerly known as High Quality, but Google changed its terminology and its backup defaults back in 2021. With Storage Saver, video files are stored in their original quality up to 1080p. If your video is higher than 1080p, like a 4k video, it will be resized and processed to compress it and reduce the storage space it takes up. Since 4k video is so much larger than 1080p video, and since the most common use case (phone saving and playback) isn’t really affected by the difference between the two, this is fine for a lot of common personal uses.
![]()
![]() Note: The compression to Storage Saver will likely lose some information, such as closed captions built into the video. Since Google wants to save space where it can, it will strip unnecessary data or just not care about it in the conversion and compression process. Videos under 1080p aren’t altered. Also, very large videos or unusual videos, as well as videos in formats Google doesn’t normally support, won’t be converted.
Note: The compression to Storage Saver will likely lose some information, such as closed captions built into the video. Since Google wants to save space where it can, it will strip unnecessary data or just not care about it in the conversion and compression process. Videos under 1080p aren’t altered. Also, very large videos or unusual videos, as well as videos in formats Google doesn’t normally support, won’t be converted.
“Express” is similar to Storage Saver, with one significant difference. Instead of capping video quality at 1080p, they cap it at 480p. This is a significant reduction in both file size and video quality, so only choose it if you know you don’t need any of the detail of the video in its original quality.
Note: You can always downscale your videos by changing your backup quality, but you can’t upscale them without re-uploading the original file.
That’s also important to know: Google doesn’t convert the original file; they create a converted copy of the file to back up. As long as you don’t delete your original video file, you won’t lose the high-quality version of it. However, if you back up a video file from a phone to Google at a lower quality level and delete the original, the reduced-quality version of the video will be the only version you have.
Google Drive Video Backup
When you upload a video directly to Google Drive, whether you do so via the web interface, Google Drive for Desktop, one of the built-in sharing options, or using another method, there’s no compression of the video at all. It’s saved in its original quality, as you uploaded it.
However, Google still processes and converts, downscales, and compresses the videos you upload.
Why? Google Drive has a built-in video player so that users can watch a video directly from Google Drive without having to download it first.
It’s a convenient option to make sharing videos casually a lot more accessible. It has issues, like the “still processing this video” error, but it’s convenient when it works. It’s feels a bit like YouTube, like a sort of YouTube “Lite”.

They also scan the file for viruses and for copyrighted content, and they may ask you to remove the file if any are found, but only if the video is shared. If it’s kept private on your Google Drive account, they don’t do these scans. They may detect malware, but they won’t force the file to be deleted; they’ll just warn you about it (since virus researchers use Google Drive on occasion.)
So, when you upload a video file to Google Drive, the file is uploaded as-is, but it’s also transcoded into a playable format, compressed, and made accessible using the Google Drive video player. However, there are limits to this.
- If the video is larger than 1080p, Google will create a compressed version downscaled to 1080p for playback. That said, they don’t always do this effectively, and very large files (both in file size and resolution) might not be processed.
- Only certain video formats work with the video player. They will convert and allow playback for WEBM, MPEG4, 3GPP, MOV, AVI, MPEGPS, WMV, FLV, MTS, and OGG files, though certain audio codecs will not work.
- The cap on file size is 5 TB, assuming you have unlimited account storage. Otherwise, the cap is whatever your account storage is.
A basic personal Google Drive account with 15 GB of space cannot upload a video larger than the available space remaining on the Drive.
This is all for Google Drive’s Video Playback feature, not the storage. When you upload a video to Google Drive, and it doesn’t meet the requirements to be played streaming from Google Drive, the video file is still there in its entirety. You can share it with other people just like any other file, and it can be downloaded in its original quality at any time.
Luckily, when Google creates a compressed and downscaled copy of a video, that does not take up additional space in your Google Drive account. Only your original file takes up space.
Should You Compress Your Videos Before Uploading?
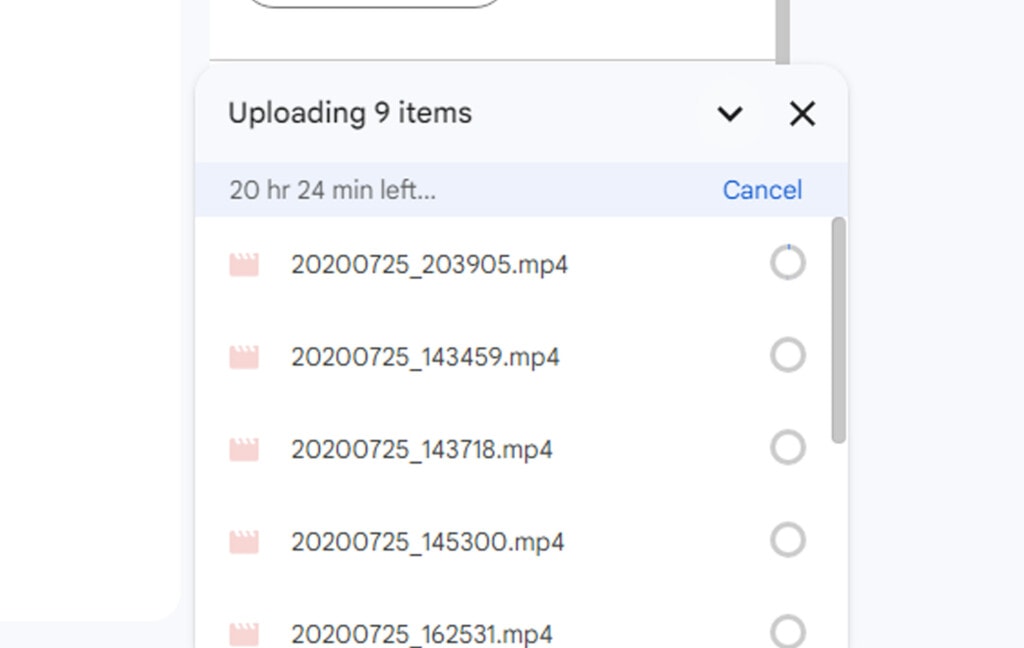
Now this is an important question. When you’re storing video files on Google Drive, you’re using up a ton of space, and you can very easily eat through a personal Drive account’s quota in no time at all.
So, should you compress your videos first? If so, how?
The answer really comes down to what purpose you have in store for the videos.
You should compress your videos if:
- You want the memories and data archived but don’t necessarily care about the minor details and ultra-high quality of the footage.
- The purpose of the videos is such that they won’t benefit from high quality, or they will be downscaled or compressed when you use them later.
- You’re more concerned about storage space than video quality.
- You desperately need to clear space on a local phone or computer and have spotty or limited internet access to do it.
On the other hand, you should avoid compressing your videos if:
- You need the original quality video as a source for high-definition projects later, like 4K YouTube videos, movies, or other major video projects.
- You’re more concerned about the fidelity of memories and content than you are about your storage space.
- You know your way around video editing software and want to do more editing than simple compression or downscaling.
It’s really a personal choice of how you want to save your videos.
How to Compress Videos for Google Drive
There are as many different ways to compress video as there are stars in the sky. Okay, maybe not quite that many, but for as long as we’ve been able to capture video, people have been looking for ways to optimize it.
Here’s a rundown of the options you have.
- Use Google Photos to manage your videos and upload them in Storage Saver or Express Quality. This gives you very few options, but it is fast and easy.
- Use a video compression utility. There are dozens of these out there, like Compressor, Video Compress, VEED Video Compressor, Panda Video Compressor, Video Dieter 2, Smart Video Compressor, Handbrake, and many more. I don’t have a recommendation here; you’ll need to do your homework. These are generally fairly simple utilities, but check to make sure they don’t watermark or tangible alter your videos.
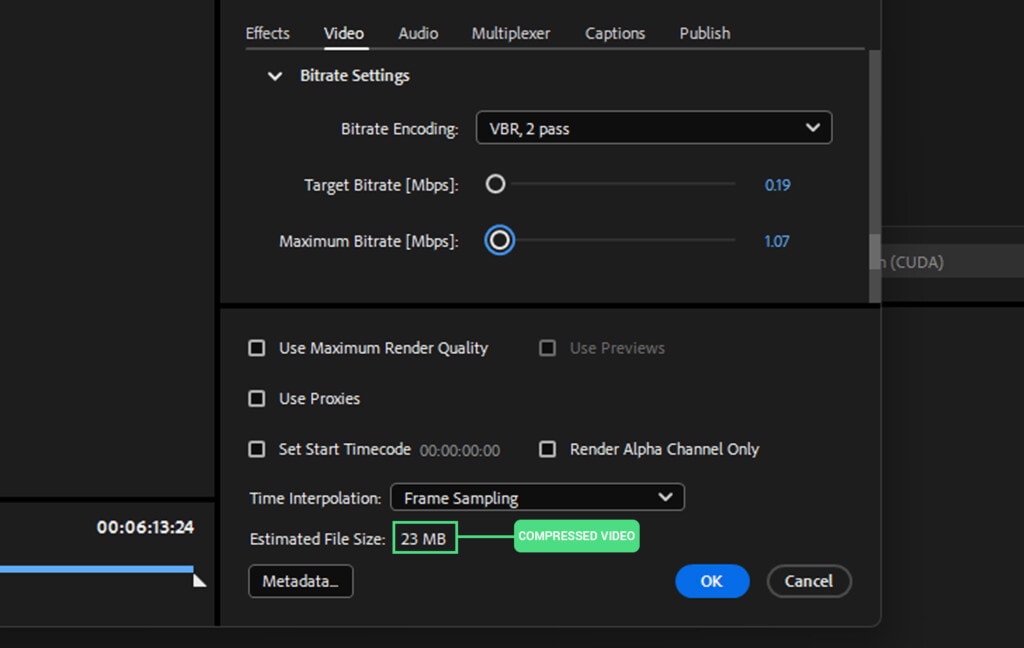
- Use a video editing program to make more nuanced compressions. These programs are heavier and harder to use and often cost money, but they are more reliable and give you way more configuration options. The software here includes options like Adobe Premier, Final Cut Pro, Apple iMovie, DaVinci Resolve, Movavi, Filmora, and more.
- Use a file compression utility. WinZip, WinRar, IzArc, and other compression utilities will crunch down your file into a zip file, which is much smaller than raw video but can be reconstituted in full quality. These are a great option for temporary compression, but they aren’t video files, so you won’t be able to play the video from Google Drive, and anyone who wants to use or play the file will need to download it.
The option you pick here depends on your needs. Collaboration online might not want to compress video at all. Meme video sharing might use crunchy, simple compression.
File sharing can use Zip files without issue. It’s all down to why you’re uploading your videos in the first place.
Running Out of Space? Try Filerev
Videos take up a ton of space, but it might not be obvious at first glance that your space is being consumed by videos, or you might not realize just how many videos you have.
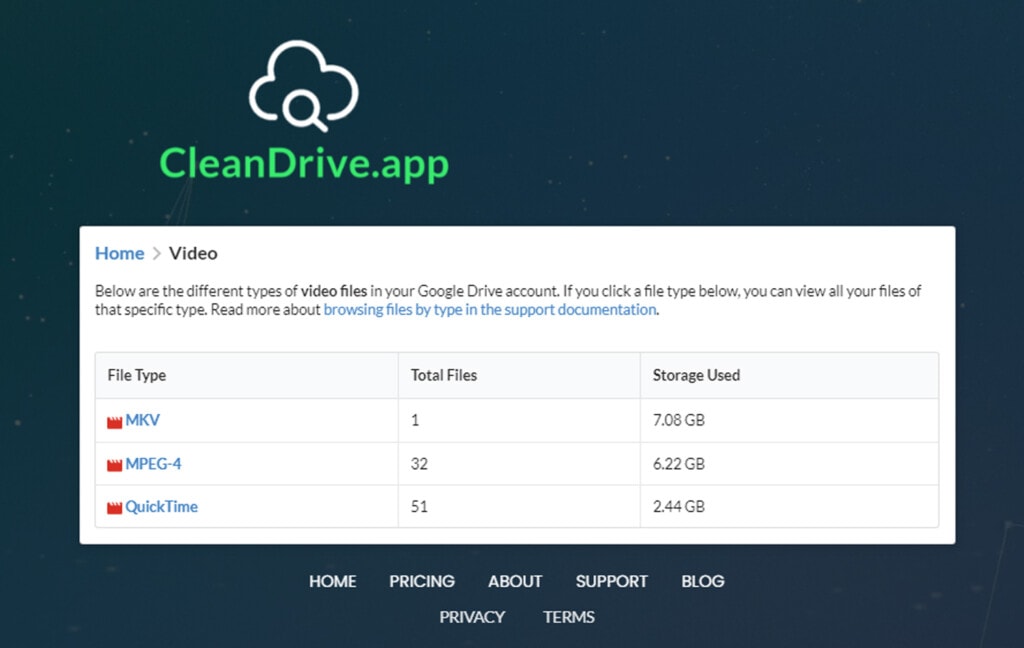
This can be especially relevant with things like Google’s Motion Photos, which are photos that have video information stored in them and take up much more space than just a photo.
If your Google Drive account is running out of space, and you suspect videos – or you aren’t sure why – I recommend giving Filerev a whirl. With Filerev, you can audit, sort, and identify the largest files on your Drive and pick out all the video files, so you can see what you have, where your space is going, and what you can do to clean and optimize your storage. Just click here to get started!
Related Posts
 Powerful Tool to See Your Google Drive Folder Size
 File Size Limits: What is The Max Upload Size on Google Drive?
 How to Copy ‘Shared With Me’ Files Between Google Drives
 How to Reduce Google Drive Storage and Organize Your Files
 FAQ: What Happens When Your Google Drive Storage is Full?
 5 Ways to Get More Storage on Google Drive for Free

