
Despite the name, Google Drive isn’t actually a storage drive on your computer. This is true regardless of whether you’re accessing it via the web at drive.google.com or if you’re using Google Drive for Desktop. This is a quirk of how Drive works, but it has some significant repercussions. So, why does it matter, and can you find a way to install Google Drive as a USB Drive or Hard Drive, at least as far as your computer is concerned? Let’s talk about it.
Google Drive Isn’t a Drive: Why it Matters
First of all, for the purposes of this post, I’m talking about using Google Drive on a desktop PC or a laptop of some description. That’s because you have an entirely different way of managing files and navigating, organizing, and manipulating data on app-based devices like tablets and phones. So, this applies to laptops and desktops, and it matters for both Windows and Mac devices (and probably for Linux/Unix, too, but if you’re using one of those, chances are you already know everything you need to about managing drives.)
Also, a lot of what I’ll reference here is Windows-centric, but most of it also applies to Macs, just with slightly different terminology. The core issues and solutions are essentially the same.
So, enough beating around the bush. Why does it matter if Google Drive isn’t technically a drive?
Two reasons.
The first is convenience. When you’re browsing folders and files on your computer using something like Mac’s Finder or Windows’s File Explorer, you’re navigating a hierarchical data structure. At the top of that structure is your overall environment. Within that, you typically have entries for your PC, your network-accessible devices, and usually entries for linked cloud storage systems like OneDrive or Dropbox.
If you use and access Google Drive from the web, you can’t access it at all from within something like Finder or File Explorer.
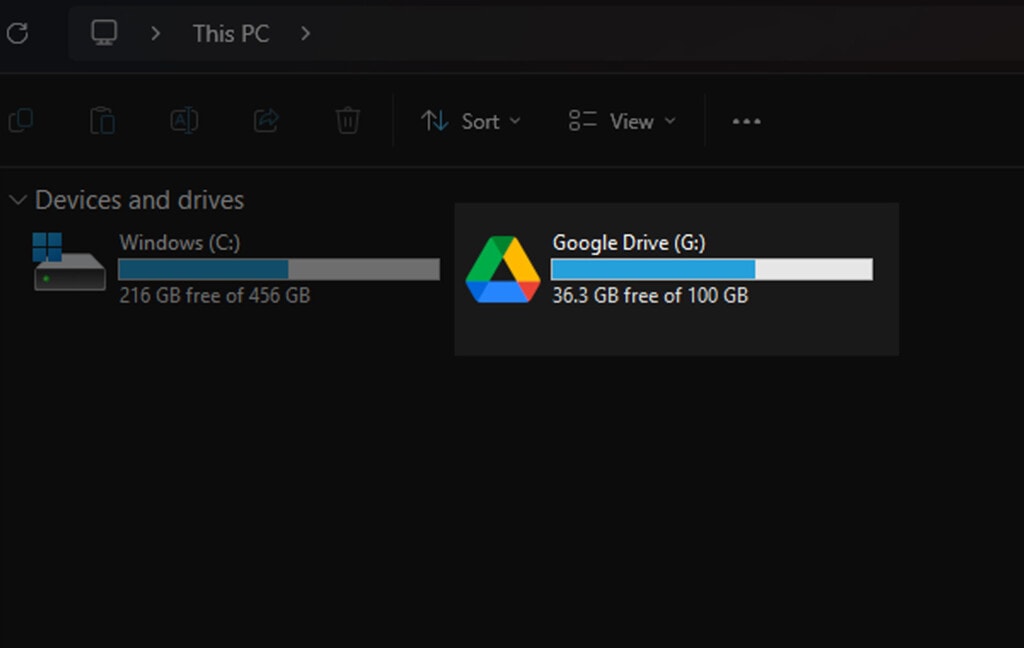
If you use Google Drive for Desktop, though, you can. Specifically, it will be under “This PC” or the Mac equivalent.
In Windows, your core drive is usually the C: drive. Why C? It’s a holdover from now-ancient technology. Typically, the A: drive was a floppy disc drive – you know, the actual physical hardware that the Save icon was based on, now long, long defunct – and B: was generally a placeholder in case your computer had a second floppy disc drive. C: was usually the first available drive for something else, so it was assigned to be the hard disk drive. After the DOS era, when Windows started to become a thing, and computers had their own always-active operating systems and stuff at a higher level than machine-level layers, that hard drive became the place the operating system lived. Thus, C: became the most important drive for Windows machines.
Later, when hard drives got larger but segmenting them into smaller portions was still useful, you could have one hard drive with multiple “drives” on it, taking up multiple drive letters. C:, D:, and E: might all be on the same physical piece of hardware, but the file system counted them as different drives, isolated from one another. This process was called partitioning. This had plenty of benefits and drawbacks, most of which aren’t really relevant to this discussion.
Macs, of course, are a little different. Apple didn’t build off of old IBM infrastructure and instead built their own system, and while the core idea of different drives and partitions within drives still existed, Apple didn’t bother with drive letter assignments.
Anyways, to wrap this back to Google Drive, the convenience factor can be meaningful. Sometimes, when you’re browsing or navigating, you might want to go to your Google Drive instead of your C: or D: drives. Normally, you can just type the drive letter in the address bar of File Explorer and be taken to the root of the relevant drive. With Google Drive, you… well, you still can.
So, here’s the thing: Google Drive isn’t technically assigned a drive letter. However, it still pretends to have one in a way that File Explorer can understand. As you might guess, it’s G: by default. If your computer happens to already have a G: drive, or if you just want to change it to something else, you can do that from the Google Drive for Desktop settings.
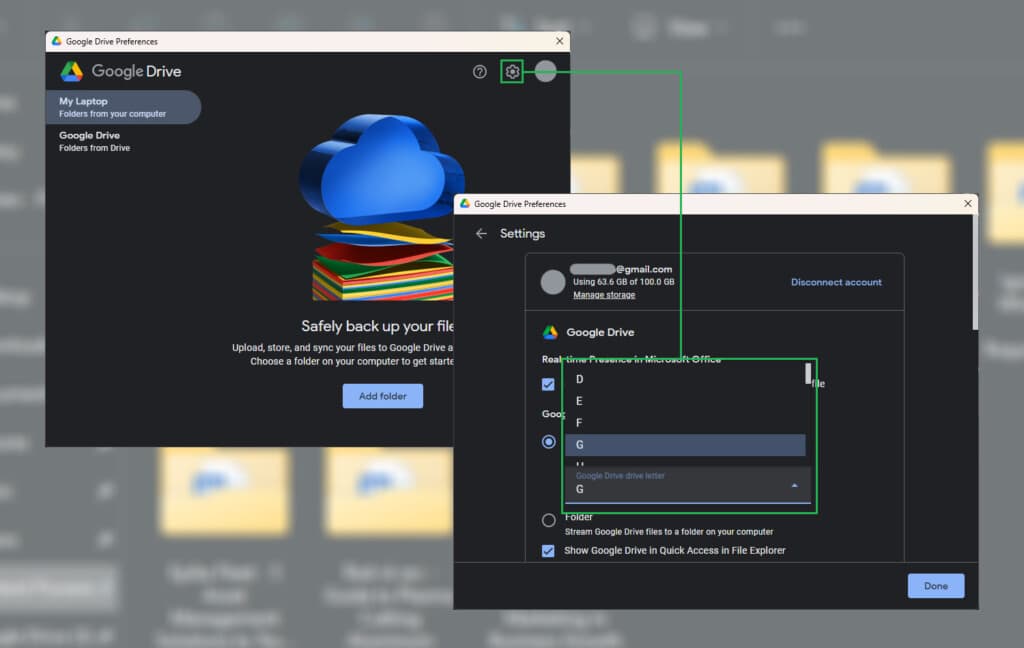
Changing Google Drive’s Drive Letter
- Click on Google Drive from your System Tray.
- Click on the Settings Gear.
- Click on the Settings Gear in the resulting menu.
- Under Drive Letter, change the letter.
Your Drive Letter can be any letter from D to Z, as long as no other drives or devices have that letter already.
The important part here is that if you want to get a file path for a file on a Windows hard drive, that path looks something like this:
- C:\Users\Username\Desktop\Filename.txt
Whereas, if you want to get the same file from Google Drive, the path looks like this:
- C:\Users\USername\Google Drive\Subfolder\Filename.txt
That’s right; it’s not technically in the G: drive because the G: drive doesn’t exist.
And, of course, if you’re streaming files and they aren’t stored locally on your computer, you get a completely different link, which looks more like this:
- https://drive.google.com/open?id=[randomlettersandnumbers]&usp=drive_fs
If you’ve read all of this and thought, “None of this is important or meaningful, it’s 2024, who even cares about file paths anymore anyway? Come on Grandpa, let’s get you your meds and turn on the Price is Right for you,” then, well, you aren’t wrong. It’s an important distinction with how Google Drive works compared to normal file storage, but it’s still a very niche impact.
So, about that second reason.
The second reason why this is important stems from the first: many apps and programs, particularly older programs, don’t really know how to handle the referential redirects in the file path that Google Drive for Desktop uses. They might not even be able to see Google Drive in their file dialogue boxes, or they might not be able to open or save to a Drive folder or file. It’s a small distinction, but it can be an important one.
Now, if you’re again sitting here and wondering why this matters, that’s fine. This post isn’t for you. Some of you, though, are using business apps and other programs, some of which may be 10, 20, or 30 years old, based on code bases that resist change more than the government. Anyone who has encountered one of these apps just plain not working with Google Drive for no apparent reason should be keenly interested in the rest of this post.
Apps to Mount a Google Drive
I’ve found three different options that can allow you to “mount” a Google Drive as if it were a network-accessible storage device (NAS), a USB drive, or even just an internal hard drive. I’ll give you a rundown of what they are and what benefits they have, and you can decide for yourself if they suit your needs.
Option 1: ExpanDrive
ExpanDrive is a business app company with a handful of different apps, including the eponymous ExpanDrive itself. That’s also the core app I’m talking about here.
ExpanDrive is a program that works for Windows, Mac, and Linux. It allows you to take pretty much any cloud storage provider, including Google Drive, Sharepoint, Nextcloud, Azure, Box, Amazon S3, Dropbox, OneDrive, Backblaze, Wasabi, OneDrive, or even your own custom FTP server, and mount it as a virtual drive to your computer.

This has a lot of definite benefits above and beyond what you get simply using Google Drive for Desktop. For one thing, it’s more tightly integrated into Finder or File Explorer, just the way any other USB or hard drive would be. It can handle offline sync and fast background uploading/downloading files, and it integrates directly into your file browser’s search bar functionality, so you don’t have to search Google Drive directly using Google’s search bar when you want to find something in your Drives.
You also have a variety of file management, version management, user restriction, and other features on top of the usual Google Drive collaboration, management, and sharing features. In many ways, it’s the best of both worlds.
ExpanDrive is a one-time, own-forever program you purchase if it’s for personal use, though as is typical of this kind of app, you only get a year of support and updates unless you pay an additional fee. Individual licenses are $50, support is $25 per year, or you can pay $75 for lifetime updates. There are bulk discounts for multiple device licenses. Meanwhile, business versions start with 20 licenses and are $50 per month.
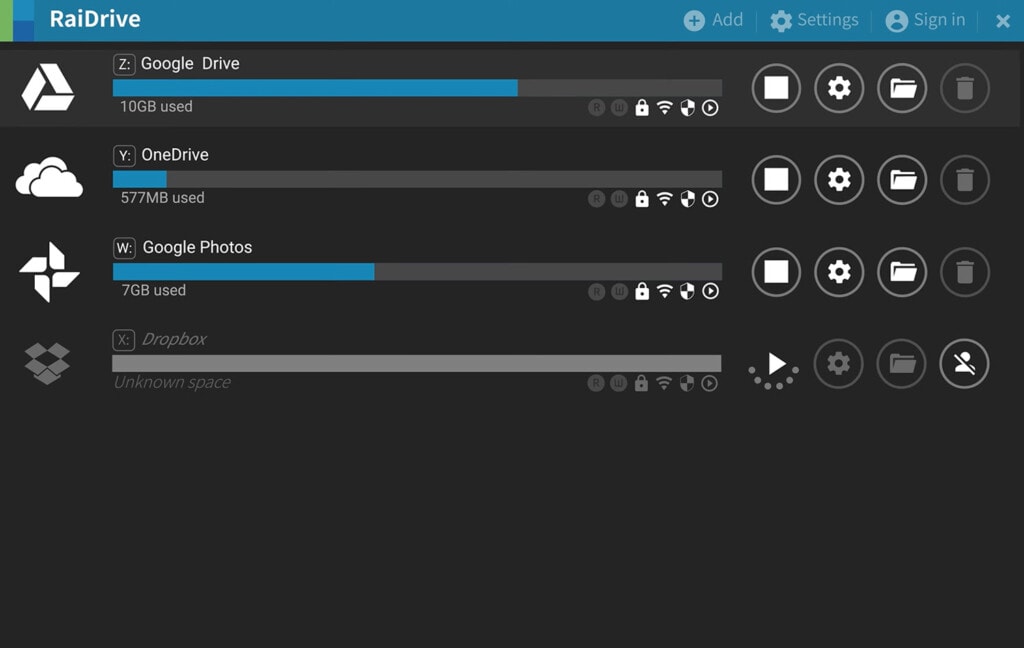
Option 2: RaiDrive
RaiDrive is named after the concept of a RAID array. This is another storage concept that most people outside of businesses these days don’t really need to care about, so don’t worry about it. Much like ExpanDrive, it allows you to mount any of a wide array of cloud storage options, from Google Drive to Dropbox to Naver to MEGA or AWS S3, as a USB device on your computer.
There are a few quirks of this system, though. The first is that only a smaller number of these services are fully accessible. Google Drive is one of them, so you don’t need to worry about that, but if you want to use AWS or Box or Google Workspace instead of just Drive, you need to pay for their higher-tier plans. Well, to be specific, it can access and read those drives but can’t upload to those drives.
RaiDrive also has a handful of free options. The basic free, zero-signup plan only supports Google Drive, OneDrive, Dropbox, Naver, Google Photos, FTP, SFTP, and WebDAV as writable drives. Everything else is read-only and, to the annoyance of some, is supported by adding advertising to your feeds. For that reason alone, I don’t recommend it.
Other free options are for accredited educational institutions. If you’re a school or other educational facility and can prove it, they have free options for you with a lot more flexibility.
Otherwise, you’re looking at a paid version. Fortunately, paid versions have no advertising, and they’re quite cheap. The cheapest plan you can get that allows mounting Google Drive as a physical device is only $2.84 per month.
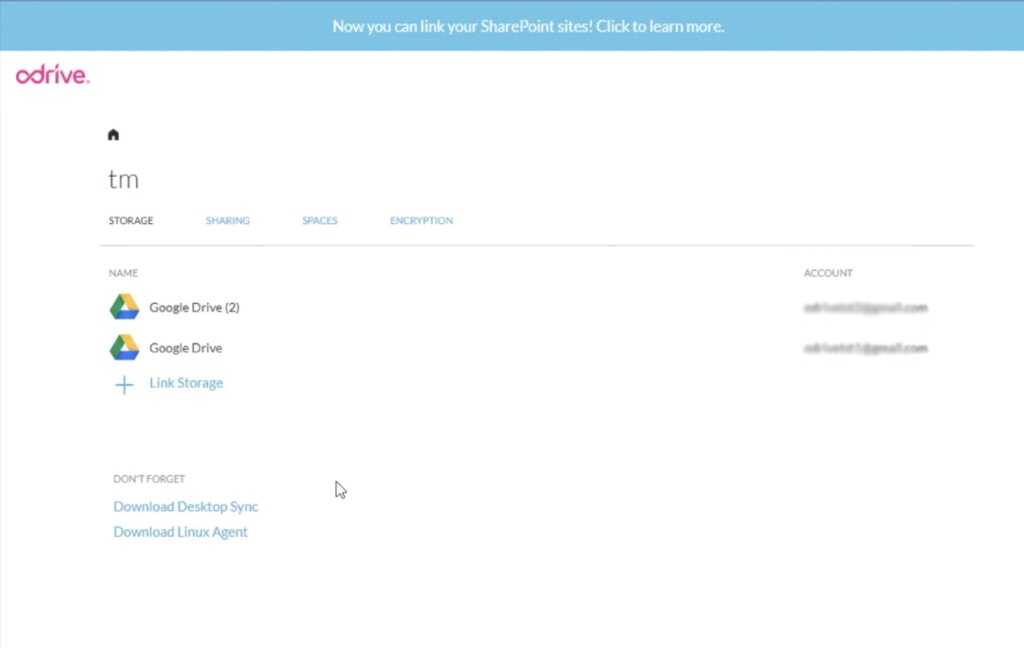
Option 3: ODrive
The third option I’ve found is ODrive. Unlike the others, instead of integrating directly into your file explorer, ODrive works in an interesting way by essentially giving you a new version of File Explorer (or Finder) that integrates those storage drives. It also comes with a variety of extra features, including securing sharing links, cross-cloud storage, automatic backups, file encryption, and more.
ODrive is pretty neat but different enough that some people won’t want to use it. Fortunately, it has a seven-day free trial, and pricing after that starts at just $8.25 per month or $15 per month per user for business subscriptions. Business plans include additional features like an extended free trial, a dedicated customer account rep, dedicated support, and more.
Overall, it’s different enough that it isn’t for everyone, but if it can solve your issues, it’s worthwhile.
Keeping Up with Google Drive
One of the hardest parts of managing Google Drive is having to keep your Drive organized and clean so you know you have available free space, and you can find everything you want to manage. Being able to mount Google Drive as a USB device is a complex way to help manage this, particularly by allowing other apps to access it and manage it all via Finder or File Explorer. But did you know there are other options?
In fact, Google Drive has an API, and through the API, you can do all kinds of cool things. For example, you can pull a full report of all the files on your Drive, including information such as how old they are and how long ago they were last accessed. You can also see files that are otherwise invisible, which even these mount-as-USB apps might miss.
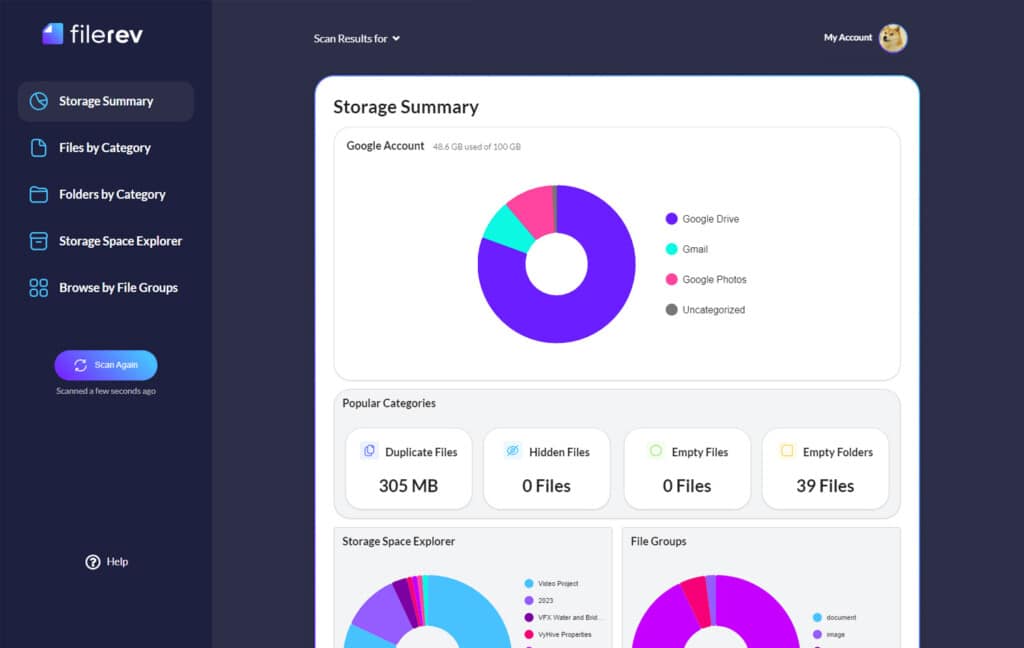
Want to know how? It’s easy: just sign into Filerev. I built this app to make use of every feature in the Drive API I can find a use for, so you have complete auditing and cleanup features at your fingertips. Give it a try!
Related Posts
 Powerful Tool to See Your Google Drive Folder Size
 File Size Limits: What is The Max Upload Size on Google Drive?
 How to Copy ‘Shared With Me’ Files Between Google Drives
 How to Reduce Google Drive Storage and Organize Your Files
 FAQ: Which File Types Are Supported on Google Drive?
 FAQ: What Happens When Your Google Drive Storage is Full?

