

We often think of Google Drive as a stand-alone app, a big bucket of storage sitting out there on the cloud that you can access via the web or the app but which doesn’t have a whole lot in the way of additional features. It doesn’t help that Google tends to shuffle around, move, or even remove functionality from time to time, like the schism between Google Drive and Google Photos.
In reality, though, Google Drive is a lot more connected than it might seem. In particular, you can use the Google API and script platform to code up an applet that can do all sorts of useful things, including routine maintenance and cleaning of your Google Drive account. The only question is, how should you go about it?
What Can You Do with Google Drive’s API?
Google’s Drive API is a powerful set of commands, and there’s a lot you can do with it. In fact, Filerev is built using it. The more complex the features you want to do, though, the more custom code, external processing, or layered directives you would need to script up.
Google Drive’s API is a REST API, which means it’s an API that conforms to the format and constraints of the REST architecture. If you don’t know what any of that means, that’s fine; you can read about it here if you want, but it’s not really necessary to know the depth and history of REST APIs to successfully create a script.

The actual Google Drive API has a lot of features and app calls. Here’s what Google says you can do with it:
- “Download files from Drive and upload files to Drive.
- Search for files and folders stored in Drive. Create complex search queries that return any of the file metadata fields in the Files resource.
- Let users share files, folders, and drives to collaborate on content.
- Combine with the Google Picker API to search all files in Drive, then return the file name, URL, last modified date, and user.
- Create third-party shortcuts that are external links to data stored outside of Drive in a different datastore or cloud storage system.
- Create a dedicated Drive folder to store application-specific data so the app cannot access all the user’s content stored in Drive.
- Integrate your Drive-enabled app with the Drive UI using the Google Drive UI. It’s Google’s standard web UI that you can use to create, organize, discover, and share Drive files.
- Apply labels to Drive files, set label field values, read label field values on files, and search for files using label metadata terms defined by the custom label taxonomy.”
That’s a lot! For the most part, you won’t need to worry about most of that unless you’re trying to make some pretty advanced programs using Google Drive as a component.
In addition to Filerev, there are a lot of examples of apps that use the Google Drive API in the real world. For example, any app that allows you to link or merge cloud storage platforms like Drive and Dropbox uses the API to communicate between the two. Any third-party app allows you to access your files, upload new files, or manage your files using the API.
Even platforms like Zapier, IFTTT, or Zoho Flow use the API to do what they can do.
How to Use the Google Drive API Yourself
There are a few different ways to use the Google Drive API. You can use apps that use it, you can use platforms that let you create workflows that use it, or you can use it directly.
Using it directly is the simplest option because you don’t have to deal with other businesses, other people, or the various pricing structures layered between you and the functions you want.
In order to actually use the Google Drive API, though, you need something else: Google Apps Scripts. This is a developer platform you can use as part of your Google account, found here. It works in a similar way to a combination of Google Docs and Google Drive; you have files and projects organized as documents you can access. The difference is that Scripts allows you to create, well, scripts. These scripts can then run on a regular or sporadic basis – however you prefer, as long as they’re within the Google API limits.
![]()
![]() Note: Google’s API limits are pretty high, so a casual user is unlikely to reach them. If you’re curious about what they are, though, you can read about them here.
Note: Google’s API limits are pretty high, so a casual user is unlikely to reach them. If you’re curious about what they are, though, you can read about them here.
So, how can you get a simple API script set up?
Creating a Simple Clean-Up Script
Let’s walk through the process of creating an extremely simple script.
As you may know, Google Drive doesn’t immediately delete files when you delete them. Instead, the files are moved to a Trash folder. They still take up space on your Drive, which is why many people are confused when they delete files, but their available space doesn’t go up. You can manually clear the Trash or recover files you accidentally deleted. Anything left in the Trash folder for more than 30 days is automatically deleted.
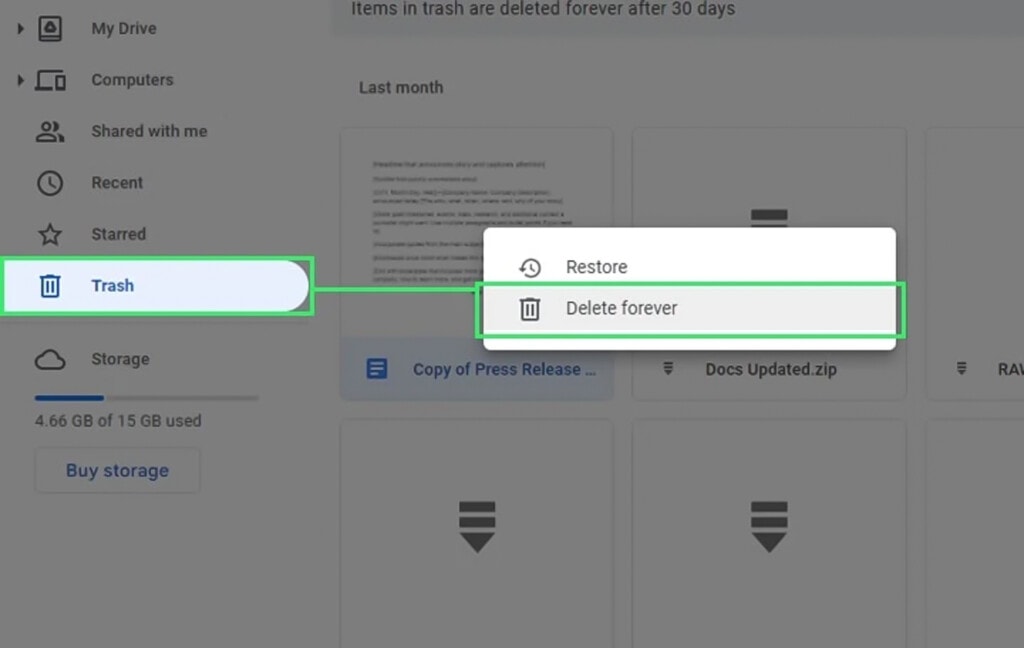
That’s fine for many people, but if you have a lot of files you add, edit, share, and remove, you can fill up a Drive quickly, and a 30-day timer means a lot of space is used up with files you’d prefer were deleted. With the Google Drive API and Google Apps Scripts, you can set up a simple script that will empty your trash on a regular basis, more often than every 30 days.
Here’s how.
Start by clicking the link to visit Google Apps Scripts. Log into the same Google account you’ll be managing the Google Drive for. You can create an app that can manage someone else’s Google Drive, but that other account needs to authenticate, and that’s a whole additional process I’m not going to cover here, so let’s skip it.
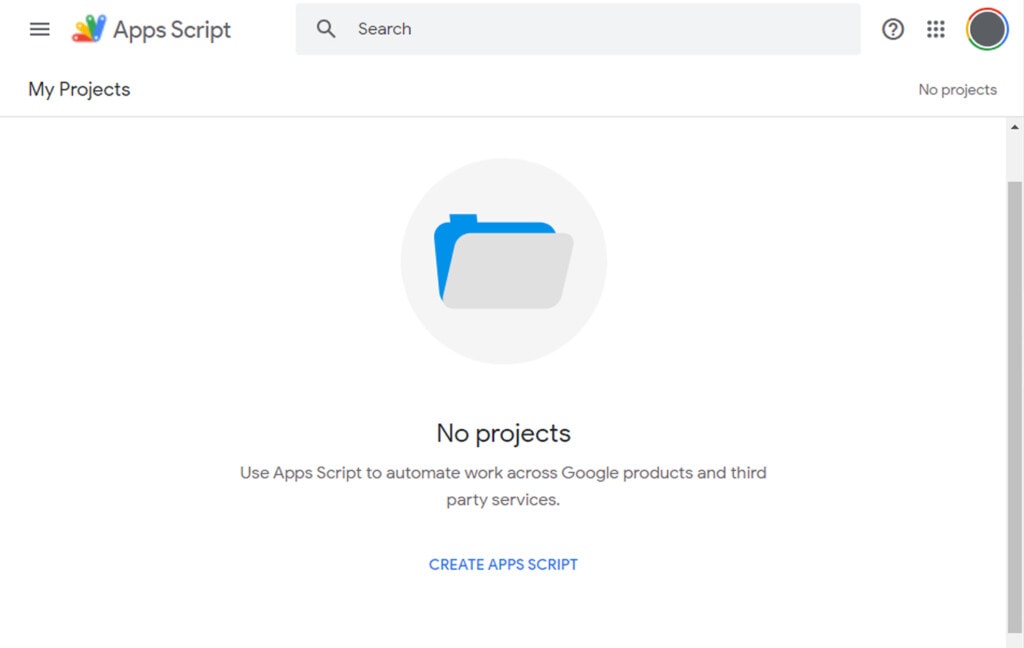
Once you’re logged in, you’ll see a mostly blank page. Unless you’ve created, downloaded, or shared with you some projects that use Google Apps Scripting, you’ll probably see a blank list of projects with nothing there. Otherwise, you might see some Google Sheets or other documents that have scripts in them that require the platform to execute. Either way, you can ignore those.
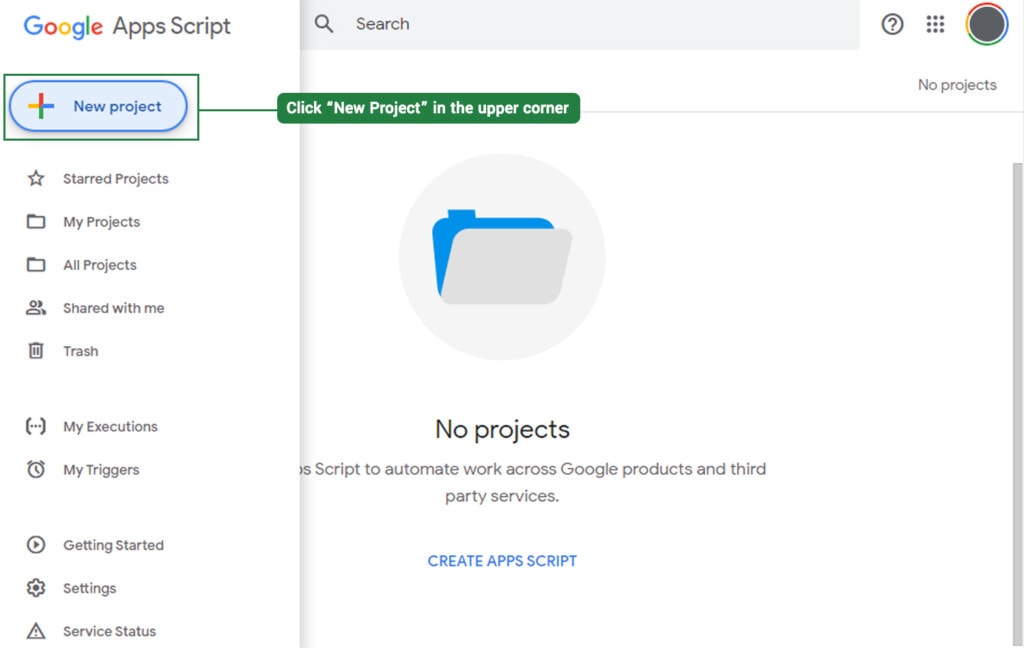
Click “New Project” in the upper corner. This will create a new project for you with the core formatting already applied. This is the place you will type in or paste in the code you want to use.
![]()
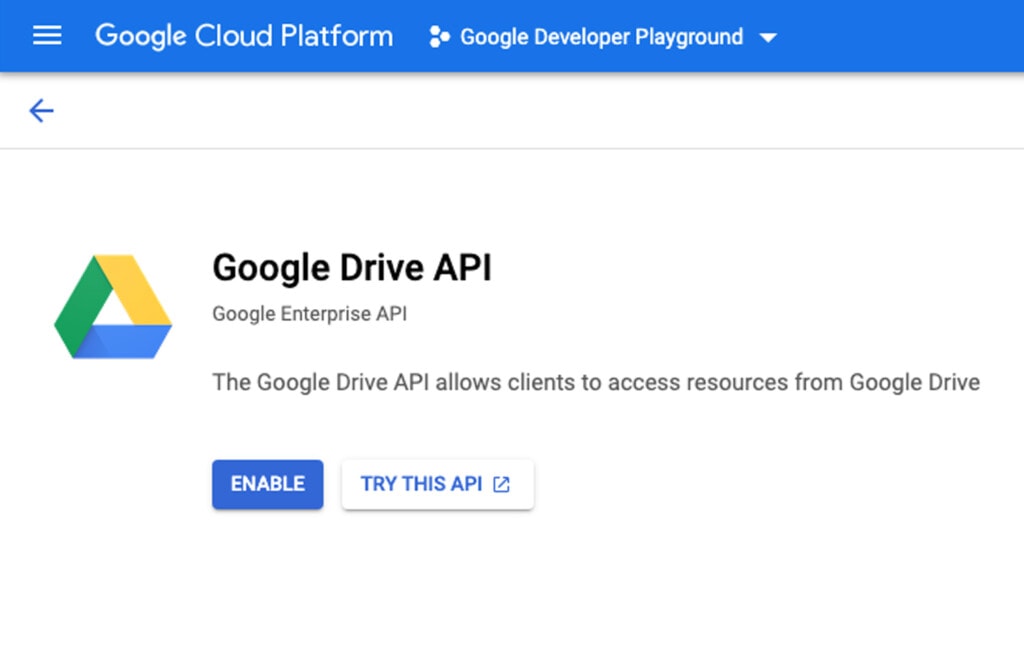
![]() Note: Before you even think about the code, you need to enable Google Drive’s API for this project. Without it, even a properly configured script won’t work because the project isn’t allowed to make the right calls.
Note: Before you even think about the code, you need to enable Google Drive’s API for this project. Without it, even a properly configured script won’t work because the project isn’t allowed to make the right calls.
On the left-hand side of the page, you’ll see a few entries with plus signs (+) next to them. Files, Libraries, and Services. Click on the plus sign next to Services, and this will pop up a box with a list of the available services you can tap into using the Scripts engine. Scroll down a bit, and you’ll see the Google Drive API; click it to add it to your project.
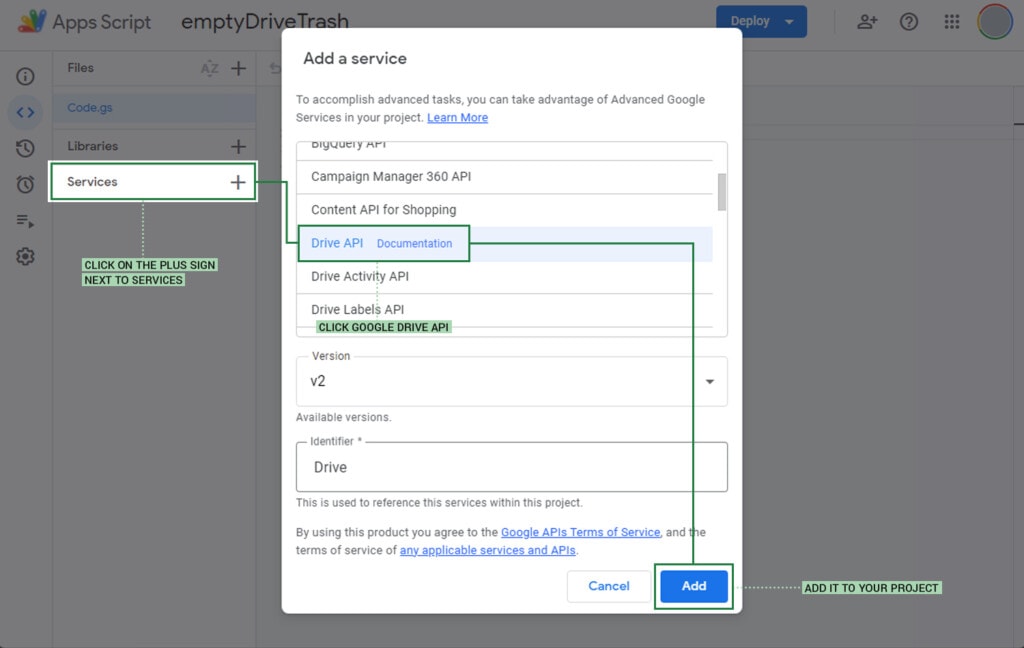
When you hover over the new entry for Drive on the left-hand side, you’ll see three dots. If you click that, you have the option to remove it, but you can also click to See Documentation. If you want to read up on everything you can do with the Drive API, you can click on that (or click here) to read it. You won’t need to if you’re just following simple instructions like these, though.
Currently, your Script should look like this:
function myFunction() {

}
That’s just an empty shell, a function with nothing in it, doing nothing. You need to do two things here.
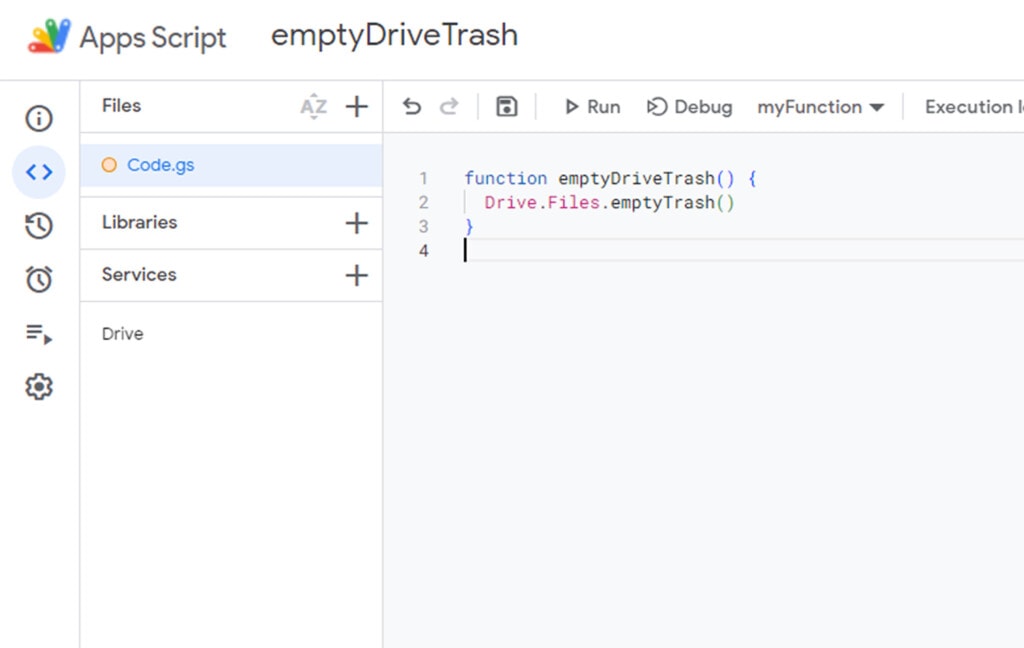
First, rename the function. Simply highlight “myFunction” and change it to something descriptive, like emptyDriveTrash. This will leave you with something that looks like this:
function emptyDriveTrash() {

}
It’s a bit better, but you’re still missing the actual code. Luckily, Google Drive’s API is very clear here; all you need is a single line. It’s this: Drive.Files.emptyTrash(). You can type this in and allow Google to auto-complete it, or you can copy and paste the whole thing. Either way, add the line of code, so your script looks like this:
function emptyDriveTrash() {

     Drive.Files.emptyTrash()

}
That’s it! That’s all the code you need for a script that will empty your Google Drive trash. However, you’re not done yet; you still have two things to do.
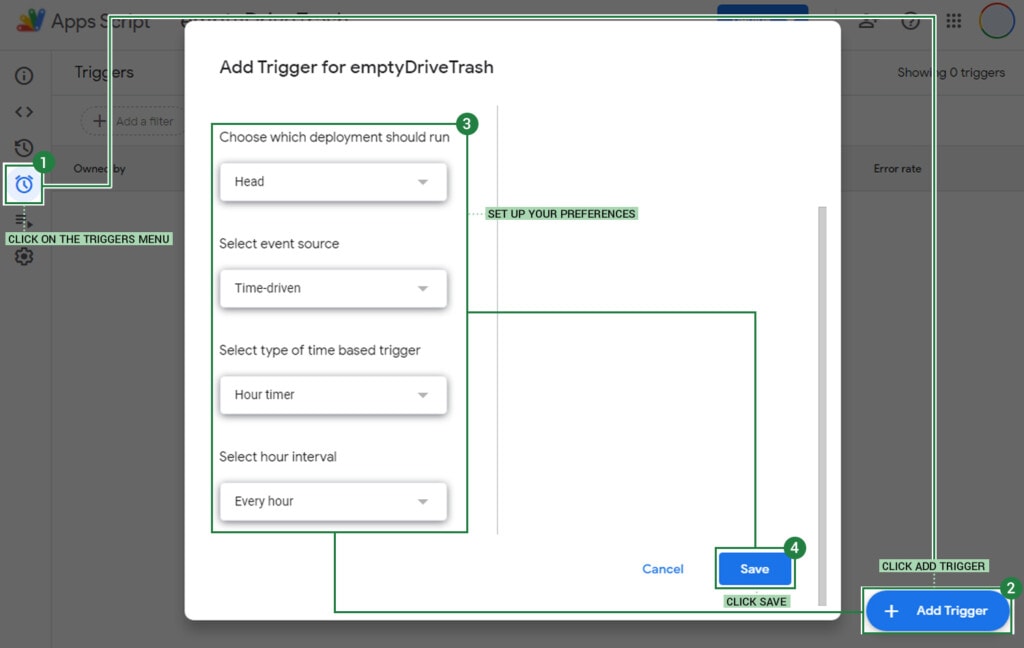
Next, you want to set up the trigger for when your script will execute. To do this, hover over the left-hand sidebar. Two of the icons look like clocks, one with an arrow around it and one with a couple of lines, making it look like an alarm. The arrow one is your project history, which you can ignore. The other is your triggers menu. Click on the triggers menu.
Here, you have another blank screen. In the lower right, click on the blue button labeled Create Trigger. This pops up a box with options.
- Choose which function to run: pick your emptyDriveTrash function.
- Select event source: this can either be time-driven or from the calendar. Choose whether you want your trash to empty on specific days or at specific intervals. For now, we’re going to choose time-driven.
- Select the type of time-based trigger: here, you can choose a specific date and time or an interval, including every X minutes, hours, days, weeks, or months. Let’s say you want your trash to empty daily, so choose Days.
- Select time of day: this will choose the hour-long opening in which the trigger will execute. Google staggers their API calls so they don’t all trigger immediately upon the clock reaching the right hour mark, so your trash might not empty at exactly 1:00 a.m. or whatever you choose, but it will empty sometime between 1:00 a.m. and 2:00 a.m.
Once you have this configured, click Save.
This will create a pop-up window, so if you have a pop-up blocker, you may get an error. Why? Google is going to ask you to allow access to your Google Drive Account so the project can be executed. You will be prompted to log into your Google account again (even though you’re already logged into the Scripts engine). Log in to allow the script access.
Once you’re done, you can go back to the main script window. At the top, there are a few buttons. One is labeled “debug”; click it, and the script will attempt to execute and will tell you if anything goes wrong. The other is Run; if the debug is fine, click Run, and you’re good to go.
Advanced API Use
If all of the above seemed a little daunting or complex, that’s fine. You don’t have to be a coder to use Google Drive’s API. You can use a platform like Zapier to set up triggers and events that do things in your Google Drive, for example, and you don’t need to know a lick of code to do it.
Suppose you want something more complex, more robust, and designed specifically for managing files in Google Drive, though – you’ll want Filerev.
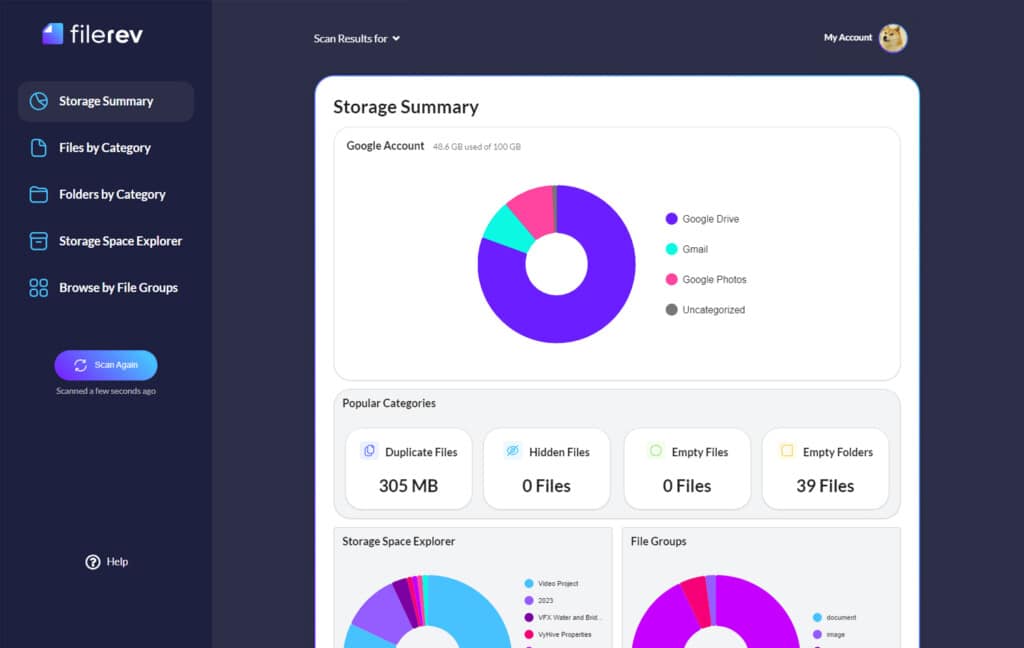
I designed Filerev to be a comprehensive management app for Google Drive. Purging trash on a schedule is just the bare minimum of what it can do. You can also help sort through and filter files, identify the oldest and least-used files, get rid of old Gmail attachments or duplicate trash between Photos and Drive, and even purge hidden and invisible files that are saved by the apps you no longer use.
If you’re curious about what Filerev can do for you, you can click on the various features up top and explore. Alternatively, I’m always available to answer questions, so feel free to drop me a line. Or, if you’d like to give it a try yourself, you can head on over to the sign-up page. There’s even a free trial if you want to explore some of the features for yourself.
Related Posts
 Powerful Tool to See Your Google Drive Folder Size
 Google Drive Trash Tutorial: How to Delete and Recover Files
 How to Delete Empty Folders in Google Drive with Filerev
 Organizing Google Drive: 16 Tips to Clean and Audit Your Files
 File Size Limits: What is The Max Upload Size on Google Drive?
 Google Drive vs Google Photos: Which Is Best for Photo Storage?

