Google Drive’s cloud storage is an excellent tool for storing files and sharing them with others without relying on your connection and uptime remaining constant and steady for everyone else.
Unfortunately, the way Google Drive handles movies and video files can cause issues, so it’s essential to know how to navigate using the system for larger video files.
Uploading Video Files to Google Drive
First and foremost, if you want to use Google Drive to store and share video files and movies, you need to put those videos or movies on your Google Drive. You generally have a few different ways you can put a video file onto Google Drive, depending on the platform you’re using to upload the video.
First, you can open up the web interface for Google Drive on a computer and drag and drop the file right into your Drive. You will then upload the file, with the speed of upload varying depending on your internet connection. Larger video files may fail in the upload process, though, and there are better options than this for big files.
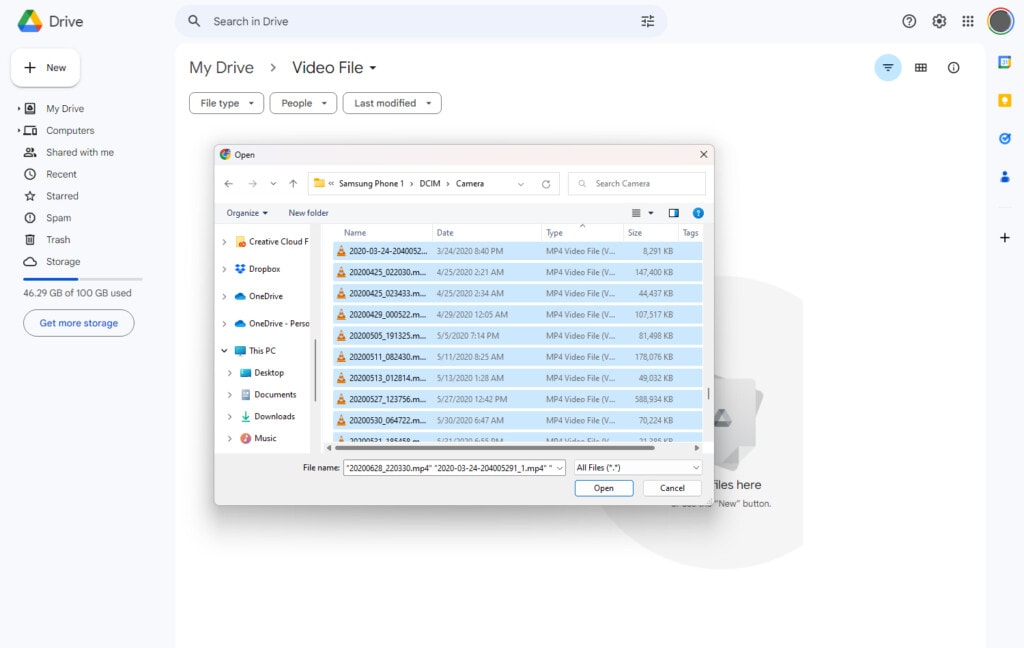
A second option is to have Google Drive for Desktop installed on your PC or Mac and drag the file into whatever folder is linked up to Google Drive. If you mirror files between Drive and your computer, you’ll pull them into the Google Drive folder. If you sync a specific folder, you need to know what that folder is and drag the videos into that folder. In either case, the next time Google gets the chance to do so, the Google Drive app will sync or mirror the file to Google Drive, and it will be uploaded. It’s no faster this way than doing it the first way, but there are more recovery and resume options if the upload is cut off along the way, and it does so silently.
If you’re using a mobile device, like an Android phone, an iPhone, an iPad, or another tablet, you have a different option available to you. For Android devices, you can navigate to the video file on your phone and find the share button. Tap that, and one of the options will be “save to Drive.” Save the file, and it will be uploaded. For iPad and iPhones, you need to have the Google Drive app installed and tap the Upload button to upload the file.
![]() Note: For all mobile devices, try to make sure you’re using an appropriate connection, whether it’s WiFi or 5G; slower connections, spottier connections, and connections with data caps can all cause problems with the upload process, especially if it fails and you have to resume. For best results, you should use WiFi, as uploading large video files over your cellular data will eat up a lot of your bandwidth and may fail half-way through.
Note: For all mobile devices, try to make sure you’re using an appropriate connection, whether it’s WiFi or 5G; slower connections, spottier connections, and connections with data caps can all cause problems with the upload process, especially if it fails and you have to resume. For best results, you should use WiFi, as uploading large video files over your cellular data will eat up a lot of your bandwidth and may fail half-way through.
Downloading Video Files from Google Drive
Downloading a video file from your Google Drive is basically reversing the steps above.
For desktop and laptop computers, you can navigate to drive.google.com, login, find the video file, and download it from there. As with any large file download, you want to make sure your internet connection is fast and stable so the download doesn’t fail partway through.
Google will use .part files to help with resuming a download, but it’s still a hassle sometimes.
Alternatively, if you use Google Drive for Desktop, you can keep the file mirrored or synced on your computer so you have it in both locations at all times. This is fine if you are okay with double-dipping your storage, but you may want to use up less space for large video files.
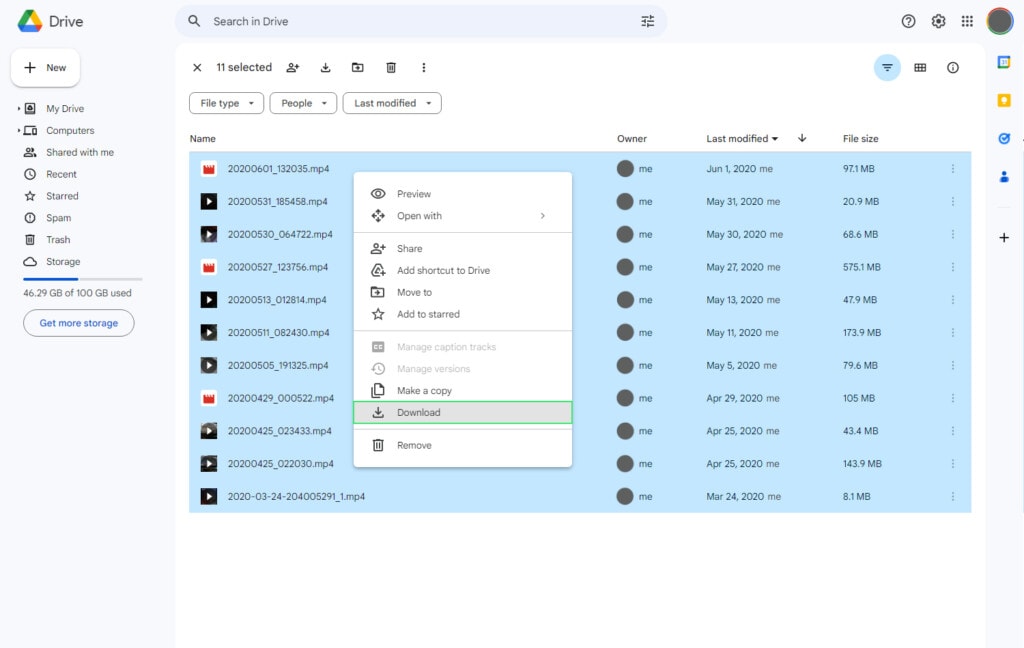
For mobile devices, similarly, you can log into Google Drive via the app, find the file, and download it.
In this case, you’ll need to make sure you have the storage space to download a local copy because mobile devices tend to have far less space available than home computers, and large movies can take up all of that space and then some.
Sharing a video file or movie on Google Drive is the same, no matter what kind of file it is.
- First, log into Google Drive, whether you’re using the app or the web interface.
- Navigate through your files and folders to find the file you want to share.
- Click or tap on the Share button.
- Choose how you want to share the file (more details below.)
- Save your changes. Generate a sharing link and copy it, and send it to whoever needs it, if necessary.
There are a few different kinds of sharing you can do with Google Drive.
The first is to share with specific people. To do this, they need to be in your Google account’s contacts list, or you need to know their email addresses. Choose the people you want to share the file with and choose what kind of sharing you want.
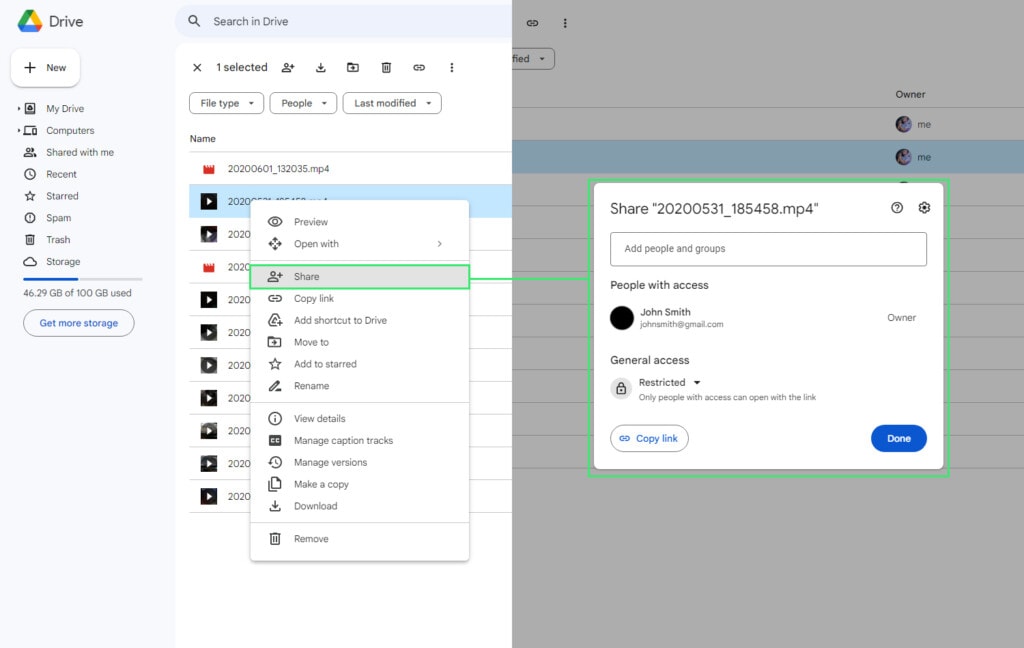
You can make them viewers, editors, or commenters, each with varying permissions, to edit the file.
![]() Note: If you use a business or educational account, you can add an expiration date to this sharing so it stops working after a certain amount of time has passed.
Note: If you use a business or educational account, you can add an expiration date to this sharing so it stops working after a certain amount of time has passed.
Alternatively, you can share the file with an entire Google Group or Google Chat space. These are essentially automated ways to share the file with a larger group instead of needing to put in each email individually, with the caveat that everyone you share the video with needs to be in the group, or you need to then share with anyone else in a different method.
The third option is to allow “anyone with the link” to view the video. This generates a sharing link to the file, and anyone who has the link can view the video. This is good for limited public sharing and for secondhand sharing (someone you share it with sharing it with someone else without you needing to know their email address.)
People who can view the file are able to watch it in Google Drive’s embedded video player, or they can download the file to play locally.
Securing Files on Google Drive
Securing your files uploaded to Google Drive is essential to protect your sensitive data and maintain privacy.
The quickest way to limit who has access to your video is by limiting who can access it, which I discussed a bit in the previous section. If your private video is able to be shared with anyone who has the link, and that link gets out to the public, it can be viewed by anybody with that link, even if you didn’t share it with that person directly.
If you’re looking for additional security options, here are three additional methods to enhance the security of your files:
- Backing up Files. Regularly creating backups of your important files is an essential security measure. Consider using Google Drive’s built-in backup and sync feature or external backup solutions to create offline copies of your files. By having backups stored on separate devices, you can protect your files from accidental deletion, hardware failures, or data corruption. Remember to regularly update your backups to ensure the latest versions of your files are secured.
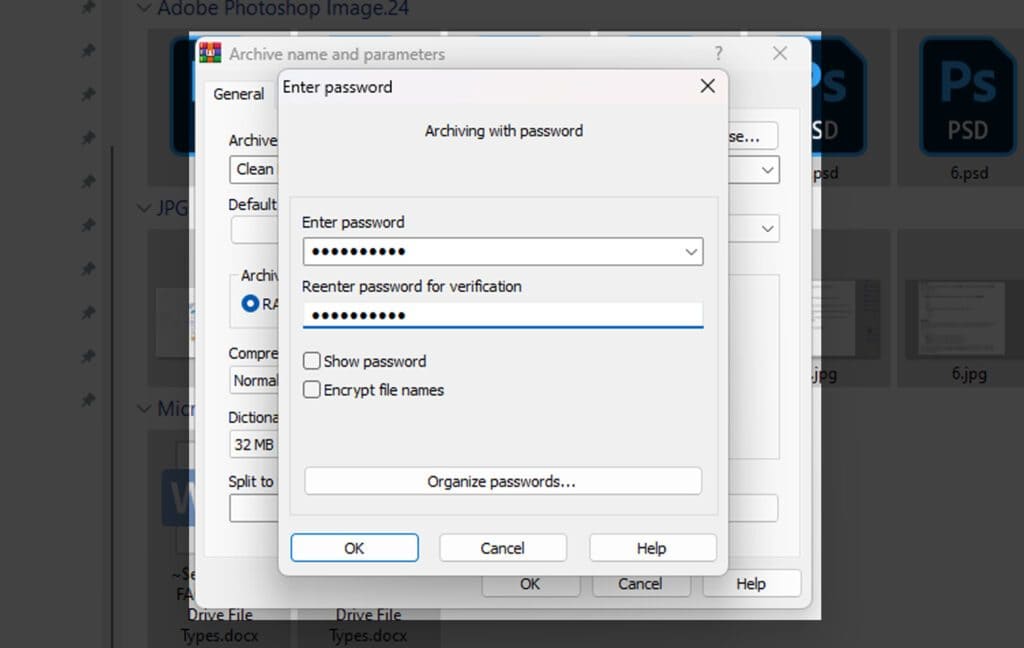
- Password-Protecting Videos. To add an extra layer of security to your video files on Google Drive, you can password-protect them before uploading. There are several compression tools or encryption software available that allow you to password-protect your files and folders. By encrypting your videos with a strong password, unauthorized individuals won’t be able to access or view the content without the password. Make sure to use a unique and complex password and avoid sharing it with others.
- Using the “Safe” Folder. Google Drive offers a useful feature for Android devices called the “Safe” folder, which provides an added layer of security for your sensitive files. Files stored in the “Safe” folder are encrypted both in transit and at rest, ensuring that they remain secure. You can move your confidential video files to the “Safe” folder to protect them from unauthorized access. To enable the “Safe” folder, navigate to your Google Drive settings and activate the “Safe” folder option. It’s important to note that access to the “Safe” folder requires additional authentication, such as two-factor authentication, to provide enhanced security.
By implementing these measures, you can significantly enhance the security of your files uploaded to Google Drive.
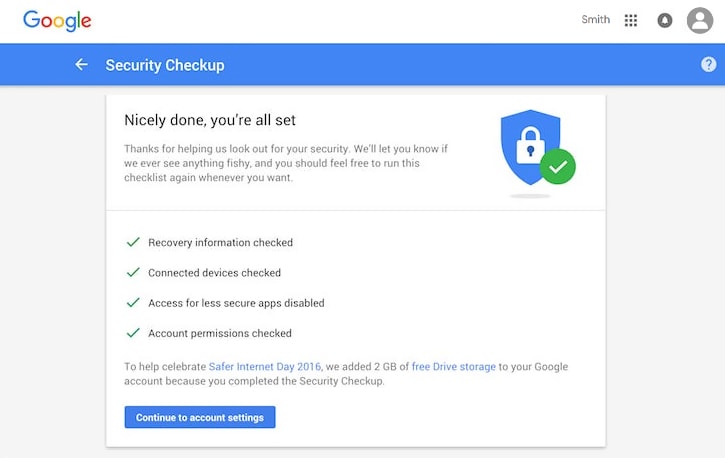
![]() Note: Remember to stay watchful with your account security, use strong passwords, enable 2FA, and regularly review and update your security settings to ensure the safety of your valuable data.
Note: Remember to stay watchful with your account security, use strong passwords, enable 2FA, and regularly review and update your security settings to ensure the safety of your valuable data.
Playing Video Files Hosted on Google Drive
Google Drive has a built-in video player. Anyone who can view a video file on Google Drive, no matter the device, can use that player to watch the video and stream it, similar to how they would watch a YouTube video. The player isn’t as nuanced and polished as YouTube, of course; it’s a more utilitarian video player built in as an accessory, not a core feature.
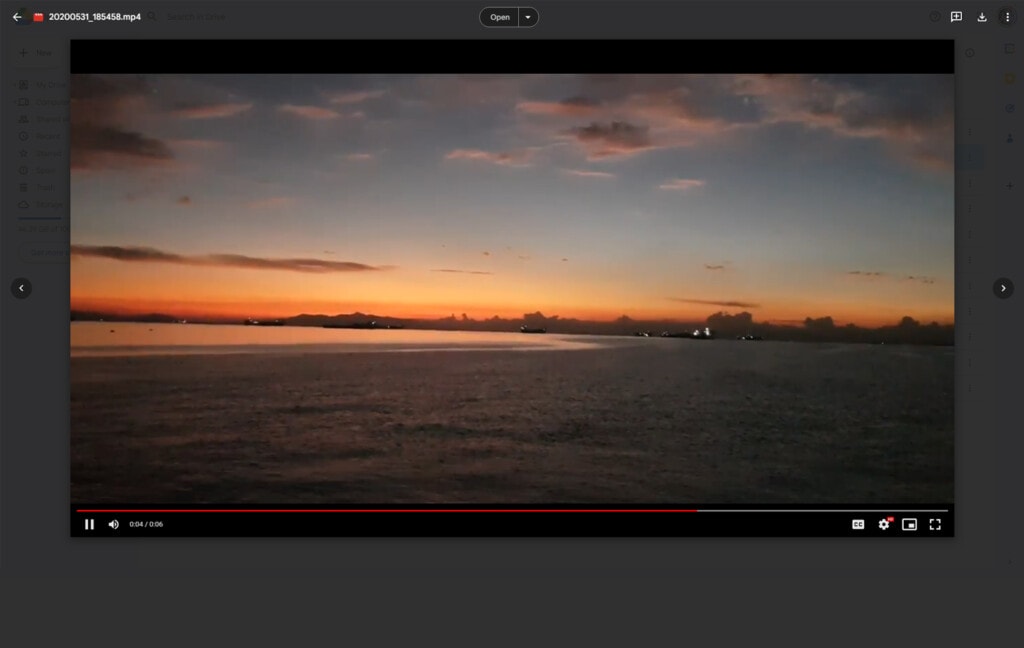
One thing to note here is that no matter what the size or quality level of the video you uploaded, Google’s embedded video player is limited to a maximum of 1920 x 1080 pixels for playback resolution.
In other words, they will play the video at a maximum of 1080p. If you uploaded a video in 4k, anyone who downloads the video could watch the original resolution, but anyone trying to play it through the embedded video player will see it downscaled to 1080p.
Limitations of Video Files on Google Drive
Though you can pay for functionally infinite storage in Google Drive, there’s a cap on the maximum size a single video file can be, which is up to 5 TB in size. Since your basic, default Google Drive account is only 15 GB, this is a significant increase. So, the cap is either the maximum size of available space in your Google Drive or 5 TB, whichever is lower.
On the flip side, the smallest a video file can be is, well, as small as you want it to be. However, Google will not generate a playback for videos under 4 KB, so anything that small or smaller will need to be downloaded to play it back.
Playback quality is also subject to your internet connection speeds. Streaming a 1080p video is not easy, and while YouTube can do it, Google Drive is not YouTube. As such, if your internet connection is slow or spotty, playback for a video hosted on Drive will either be spotty and stuck on buffering, will be lower quality, or both.
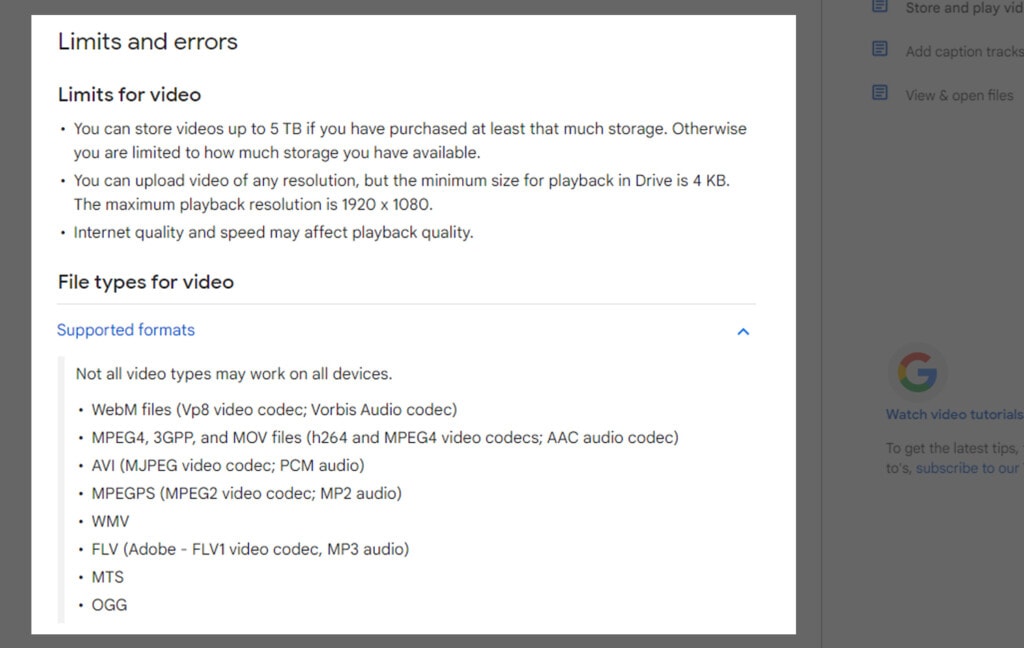
The other limitation of video and movie files on Google Drive is the file type. There are a ton of different file types for video files, but a good number of them aren’t processed or read by Google’s video player. Google’s built-in Google Drive video player will only support the following:
- WebM files using the Vp8 video codec and the Vorbis audio codec
- MPEG4 videos in either H264 or MPEG4 video codecs and the AAC audio codec
- 3GPP videos in either H264 or MPEG4 video codecs and the AAC audio codec
- MOV videos in either H264 or MPEG4 video codecs and the AAC audio codec
- AVI files using the MJPEG video codec and the PCM audio system
- MPEGPS videos using MPEG2 video codec and MP2 audio
- WMV files
- FLV videos using Adobe FLV1 video codec and MP3 audio
- MTS videos
- OGG videos
Anything that isn’t one of these video file types or codecs may cause errors or not generate a playback player from Google Drive. The videos are still there and functional, but you’ll need to download them to play them locally using whatever kind of video player you use.
A Note on Copyright and Google Drive
Google Drive does have some ability to police the content of the videos uploaded to Drive accounts.
Google will scan files that are uploaded and may prevent uploading malware-infected files, criminal files, and copyrighted materials. Google won’t take down your files without a reason, generally. But, if you upload a rip of a new Disney movie and make it publicly accessible, chances are it will be taken down immediately.
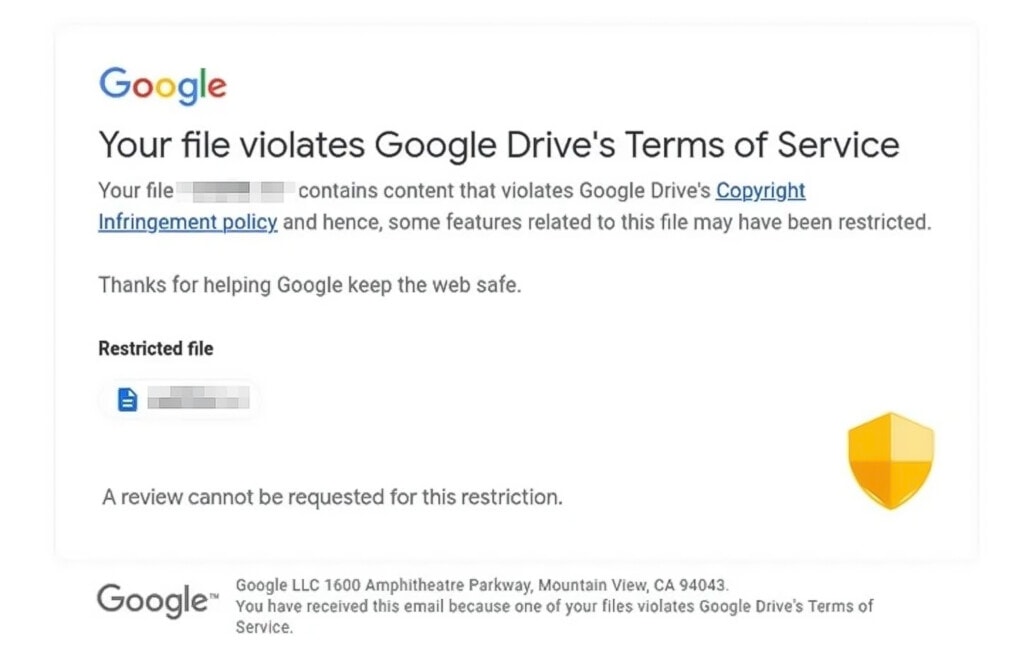
There are also occasional false positives for copyright flags, including the famous instance of Google flagging people for copyright on blank files or files containing nothing but a single letter. Nobody’s perfect. Right?
You can read more about Google’s struggles with copyright on Google Drive here, where I did a full rundown of everything we know.
Troubleshooting Errors with Video Files on Google Drive
Google Drive can pop up a few different errors with video files, and knowing what they mean can be important.
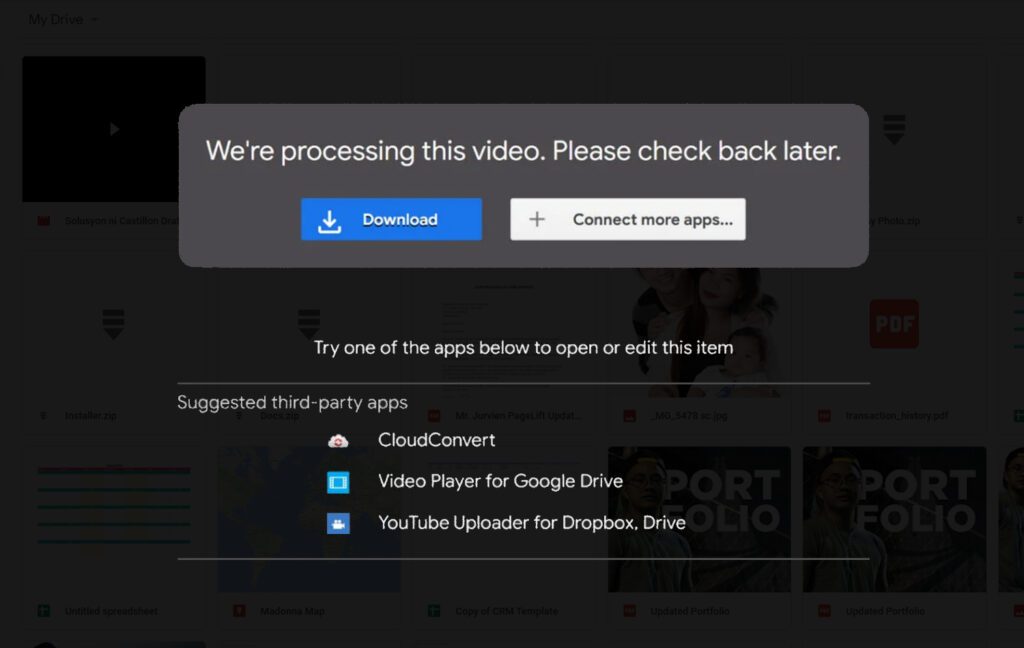
The first error is “Video is Unplayable.” This error means one of two things:
- The video file is in a format that Google recognizes as video, but their player won’t play it. That means it’s either in a video file type that they don’t support (see the list above) or it’s in one of the supported types but using an unsupported video or audio codec. You’ll need to convert the video into a format they can play or a codec they can process if you want to play it natively; otherwise, download it to view it.
- The video file was improperly uploaded or corrupted either before or during the upload and won’t work. The file is broken and will need to be removed and replaced before it can be played.
As much as the error is generic, it’s still easy to troubleshoot.
The second error is “This video is currently unavailable.” This is a simple one: it just means the video has not yet been processed, so Google can’t play it for you. You’ll have to wait for them to finish processing it, which can take a few minutes or a few hours, depending on the size of the video.
The final error is “Video is still processing. Try again later.” This, and other variations of it, is both the most common and most irritating error because a video can get “stuck” processing and never be playable. I wrote a whole guide to this error here, so check it out if you’re struggling with the issue.
Deleting Videos from Google Drive
Deleting a file from Google Drive is simple, but what if you have a cluttered Drive account and you’re not sure how you can find what files are taking up space or languishing unused?
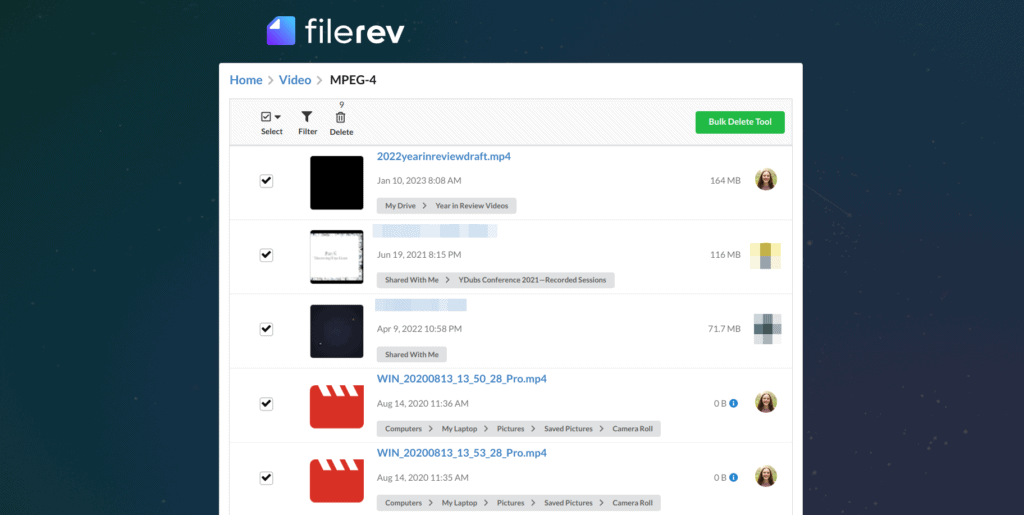
That’s where Filerev comes in.
Filerev can scan your Google Drive account and help you categorize your files, including figuring out which files aren’t being used, which ones are oldest, and which ones are largest, so you can delete them and free up space. Why not give it a look?



Leave a Reply